
Start to Finish Veneers: Part 2, Preparation and Provisionalization
It must be said that there are many methods for preparing teeth for cosmetic restorations such as labial veneers. The comfortability and personal preference of the operator that best suits his or her skill set and background in cosmetic restorative dentistry is not to be overlooked. What follows is simply one method to achieve pre-planned restorative goals of the operator and patient.

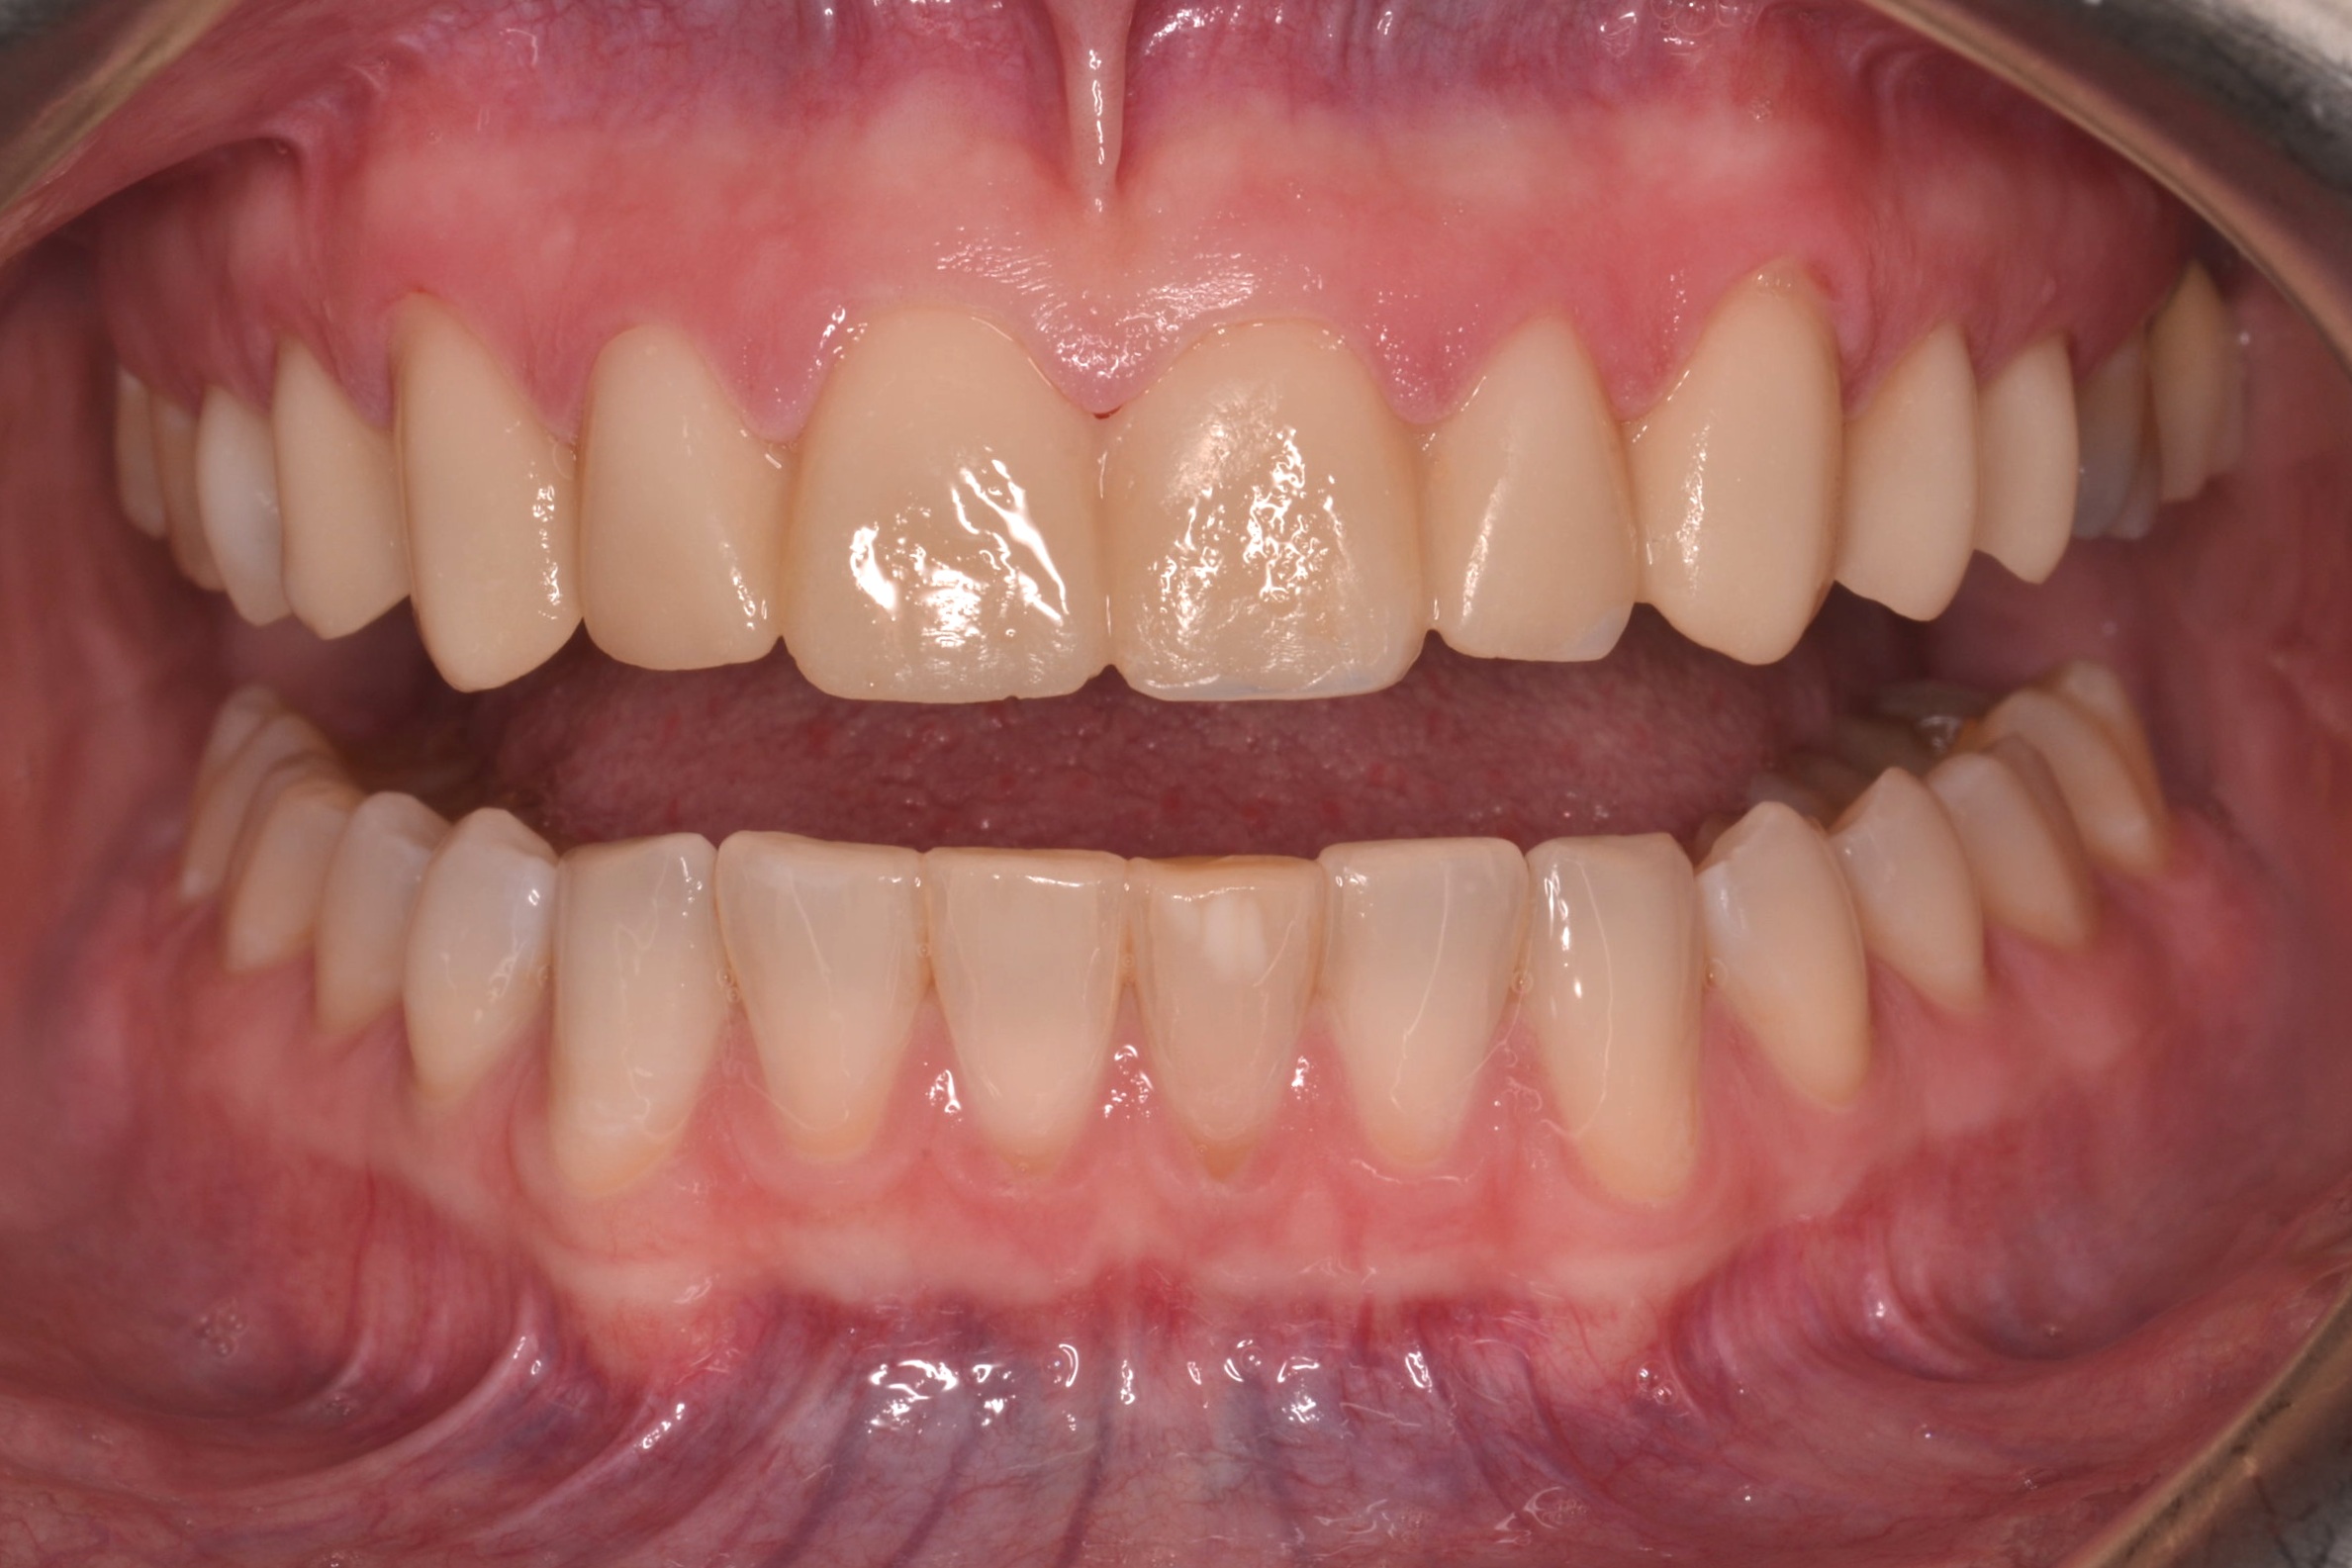
Figure 1; The prototype of the desired outcome transferred intra-orally.
After the prototype is verified by the patient and the dentist, the preparation phase of treatment can commence. The patient is anesthetized and an Optragate (Ivoclar Vivadent) is used for general isolation and retraction. The prototype is not removed, but rather utilized as a facial and incisal reduction guide that is based on the final objective. By leaving the prototype in place, tooth reduction can be performed relative to the restorative plan instead of being performed relative to the existing tooth surface. Different portions of different teeth may require more or less reduction to create a near-uniform space that will accommodate the thickness of the selected restorative ceramic material without unnecessarily removing hard tissue. The operator should perceive this process as an exercise in creating minimal space to achieve the restorative outcome, which is a very different perspective than removing a certain amount of tooth structure solely due to a preset preparation parameter. For this case, lithium disilicate (IPS e.Max, Ivoclar Vivadent) was selected as the restorative material for its esthetic qualities, flexural strength, and ability to be bonded using an adhesive resin cement. According to the manufacturer, veneer thickness should be between 0.3 mm and 0.7 mm depending on what portion of the tooth is being restored, what material is being used, and whether the restoration will be milled or pressed[1]. This is more or less consistent with instructive literature regarding tooth preparation for bonded ceramic veneers[2]. For this case, the goal was to create a space to accommodate ceramic restorations that would be 0.5 mm – 0.7 mm thick in the facial and interproximal areas, with slightly less space considered in the cervical-facial planes of the teeth and slightly more space considered in the middle-facial and incisal-facial planes of the teeth. The necessary space for the incisal edge would be 1.5 mm to fulfill both the functional occlusal demands of the restorations and allow the ceramic technician space to create micro-esthetics and translucency at the incisal edge of the restorations.

Figure 2; Depth cuts through the in-place mock-up.

Figure 3; 834 - 021 M diamond depth cutting bur (0.5 mm).
To achieve this, depth cuts are made through the mock-up (figure 3) using a 0.5 mm depth controlled bur (834 – 021 M, figure 3). Care is taken to advance the bur into the proximal areas, as adequate space for the indirect restoration is often not attained in this area. By leaving the prototype in place and using a bur with controlled depth, areas requiring more tooth removal to achieve the final design with ceramic veneers are indicated. Likewise, areas where space for the outcome already exists without preparation can also be identified. To ensure adequate incisal reduction, a cylindrical modified bevel bur is used (878 – 016, figure 4a). This bur can continue be used for axial reduction of tooth structure, but the important thing to consider here is depth control: Any cylindrical bur with a diameter of 1.4 or 1.6 mm can be used to indicate an incisal depth of very close to 1.5 mm (figure 4b). After initial depth cuts are made in the facial and incisal portions of the prototype (figure 4c), the extent of the preparation is marked with a sterilized pencil (figure 4d). Axial preparation is continued through the prototype until the acrylic material is removed to the level of the initial depth cut markings facially. The incisal edges are reduced to the level of initial notching with the 878 – 016 bur and the acrylic is removed before the preparation design continues with the aid of the incisal reduction guide and facial reduction guide (figure 4e). Respect should be given to the amount of enamel present for each individual patient, and as much of the preparation as possible should be located in enamel in an effort to conserve tooth structure and maximize adhesive bond strength.


Figure 4e; The completed facial reduction of the maxillary left central incisor.
Although many preparation designs for ceramic veneers have been proposed, there are some general guidelines to consider. First, a light chamfer finish-line should be utilized in the cervical and interproximal portions of the preparations. A round end taper diamond (856L) or modified beveled cylinder (878) in the 1.4 to 2.0 mm diameter range can be used to axially reduce tooth structure and create light chamfer margins. The finish line should follow the gingival contours and should be placed at or slightly (0.5 mm) below the gingival margin. In most cases, the finish line should be continuous with the lingual extent of a butt margin on the incisal edge to create a partial or total wrapping of the preparation. This design will prevent high tensile stresses associated with finish line extension down the palatal surface.[3,4] Placing the margin on areas with existing static or dynamic occlusal contacts should be avoided. Second, breaking interproximal tooth contact can create numerous advantages. By breaking contact, the finish line can be better captured in the final impression, margins of the final restorations will be less visible, and the ceramic technician will be afforded more freedom in approximating adjacent restorations and establishing appropriate tooth contacts (figure 5a). Although breaking contact is commonly done in cases where a large shade change is desired and in cases of diastema closure, it is not always necessary. If tooth contact is not broken, care should be taken to create an “elbow” underneath the contact area to hide margins that may be visible. Lastly, the preparation should be smooth (figure 5b). Taking time to polish preparations can offer the operator an opportunity to carefully inspect each preparation for sharp angles or hindrances to path of insertion of the restoration, and alter the prep as needed.


Figure 6; Interproximal caries discovered during initial tooth preparation
Of course, these guidelines are theoretical until surgical removal of tooth structure commences. Incidental findings such as decay or existing dental restorations can certainly influence preparation design for ceramic veneers. In this case, carious lesions were noted on multiple teeth during initial preparation (figure 6). Moreover, pre-existing restorative material on three of the four treated bicuspids was removed to ensure hard tissue health before proceeding with preparation design. After further discussion with the patient and laboratory, it was also decided that a conservative crown preparation on the maxillary left lateral incisor would produce a better functional and cosmetic result than an aggressive veneer preparation.
After pre-existing restorative material and caries were removed, tooth preparation was refined and finalized before an impression was made. As previously stated, the preps were polished during this process to ensure that there were no sharp line angles and no undercuts or impedances to a path of insertion. A size 0 cord was placed in the depth of the sulcus, followed by a size 1 deflection cord placed more superficial to the sulcular cord. Desensitizer (Microprime G, Danville Products) was applied to the prepared tooth structure and blotted dry before impressing. The more superficial cord was removed from the sulcus before the impression was made, and the deeper sulcular cord remained in place to act as a barrier to crevicular fluid or heme (figure 7a, 7b).
The final impression can be taken conventionally by placing a light body PVS wash material around the preparations while a tray is loaded with a heavy body or putty impression material is seated over the teeth to be impressed. Alternatively, a method where the tray is loaded with putty and a trough is made and then filled with the lighter body wash material before being seated can also be used. Clearly, an accurate impression is paramount. In large cases like this, there may be one or two small but important details that are not captured accurately in the total impression. If this occurs, making a supplemental impression that focuses on the information that needs to be captured more accurately can be made. The dental laboratory can then make a working die or margin die of one or two teeth without sacrificing the harmony of the composition during fabrication.


After an accurate impression of the preparations is made, an equally accurate impression of the opposing arch is made. An inter-occlusal record is made with the patient in an upright position. For this case in particular, each of these steps were imperative, as changes to the occlusal surfaces had been made as part of equilibration treatment.

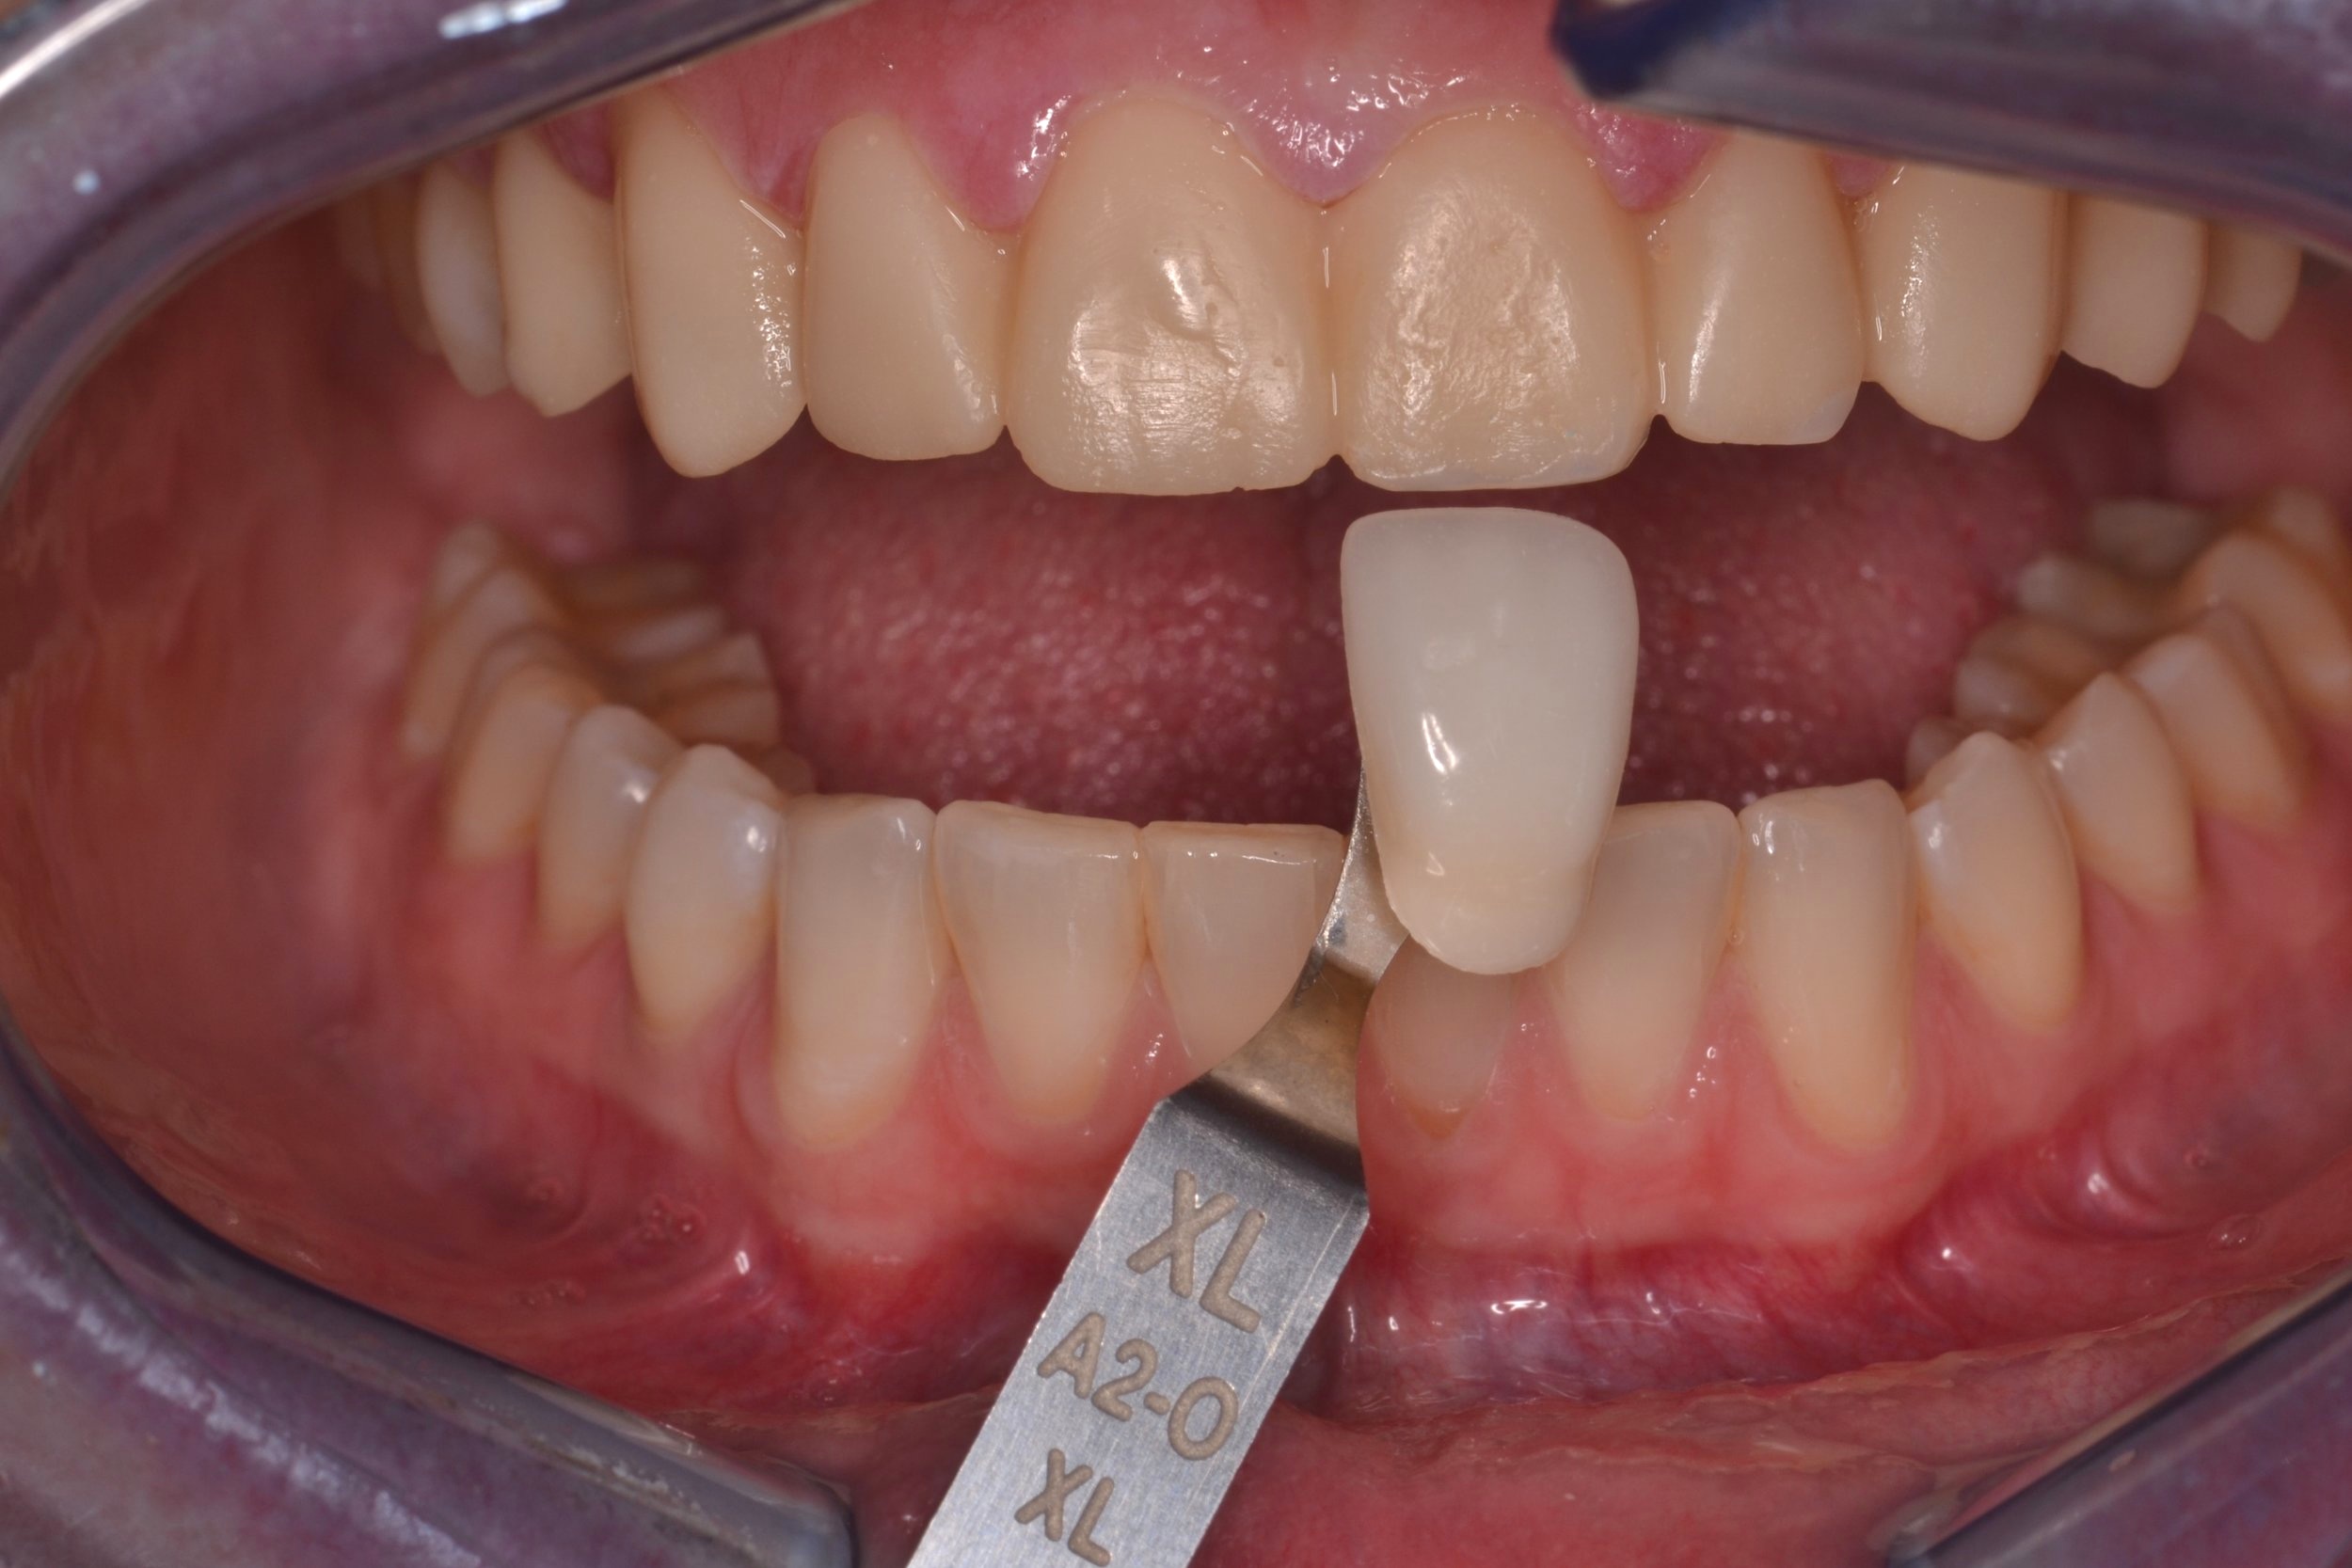
Figure 8; Die shade tab photo (photos of ND1 and ND2 were both provided to the dental laboratory)
Prior to temporization, die shade photos were taken to communicate with the dental laboratory, as the underlying tooth structure is vital information in cases of shade improvement with ceramic veneers (figure 8). Next, the preparations were spot etched, rinsed, and dried (figure 9a,b) before primer (Optibond XTR Primer, Kerr) was painted on to the preparations and air-dried (figure 9c). A shrink-wrap technique was used to provisionalize this case. The silicone putty matrix made from the diagnostic mock-up was again loaded with a provisional material (Visalys Temp, Kettenbach Dental), placed over the prepared teeth, and allowed to auto-cure (figure 9d,e). The matrix was carefully teased off of the teeth so as not to lift the recently adapted temporary material from the prepared tooth surfaces. The notches cut into the matrix help limit the amount and severity of flash (figure 9f). Gross removal of excess material can be accomplished a scaler or similar instrument (figure 9g,h) before rotary instrumentation is used to trim the margins, contour the provisionals, and open gingival embrasures for hygiene purposes. Some burs to consider for this are the 889-010 diamond separating bur (fine) and the 863-016 diamond flame bur (super fine)(figure 9i,j respectively). Rotary discs of varying grits (FlexiDisc, Cosmedent Inc., figure 9k) were used to further contour and polish the provisional restorations. The occlusion is adjusted as necessary. Once the occlusion is verified, the esthetics are approved and the composition is polished (figure 9l,m).
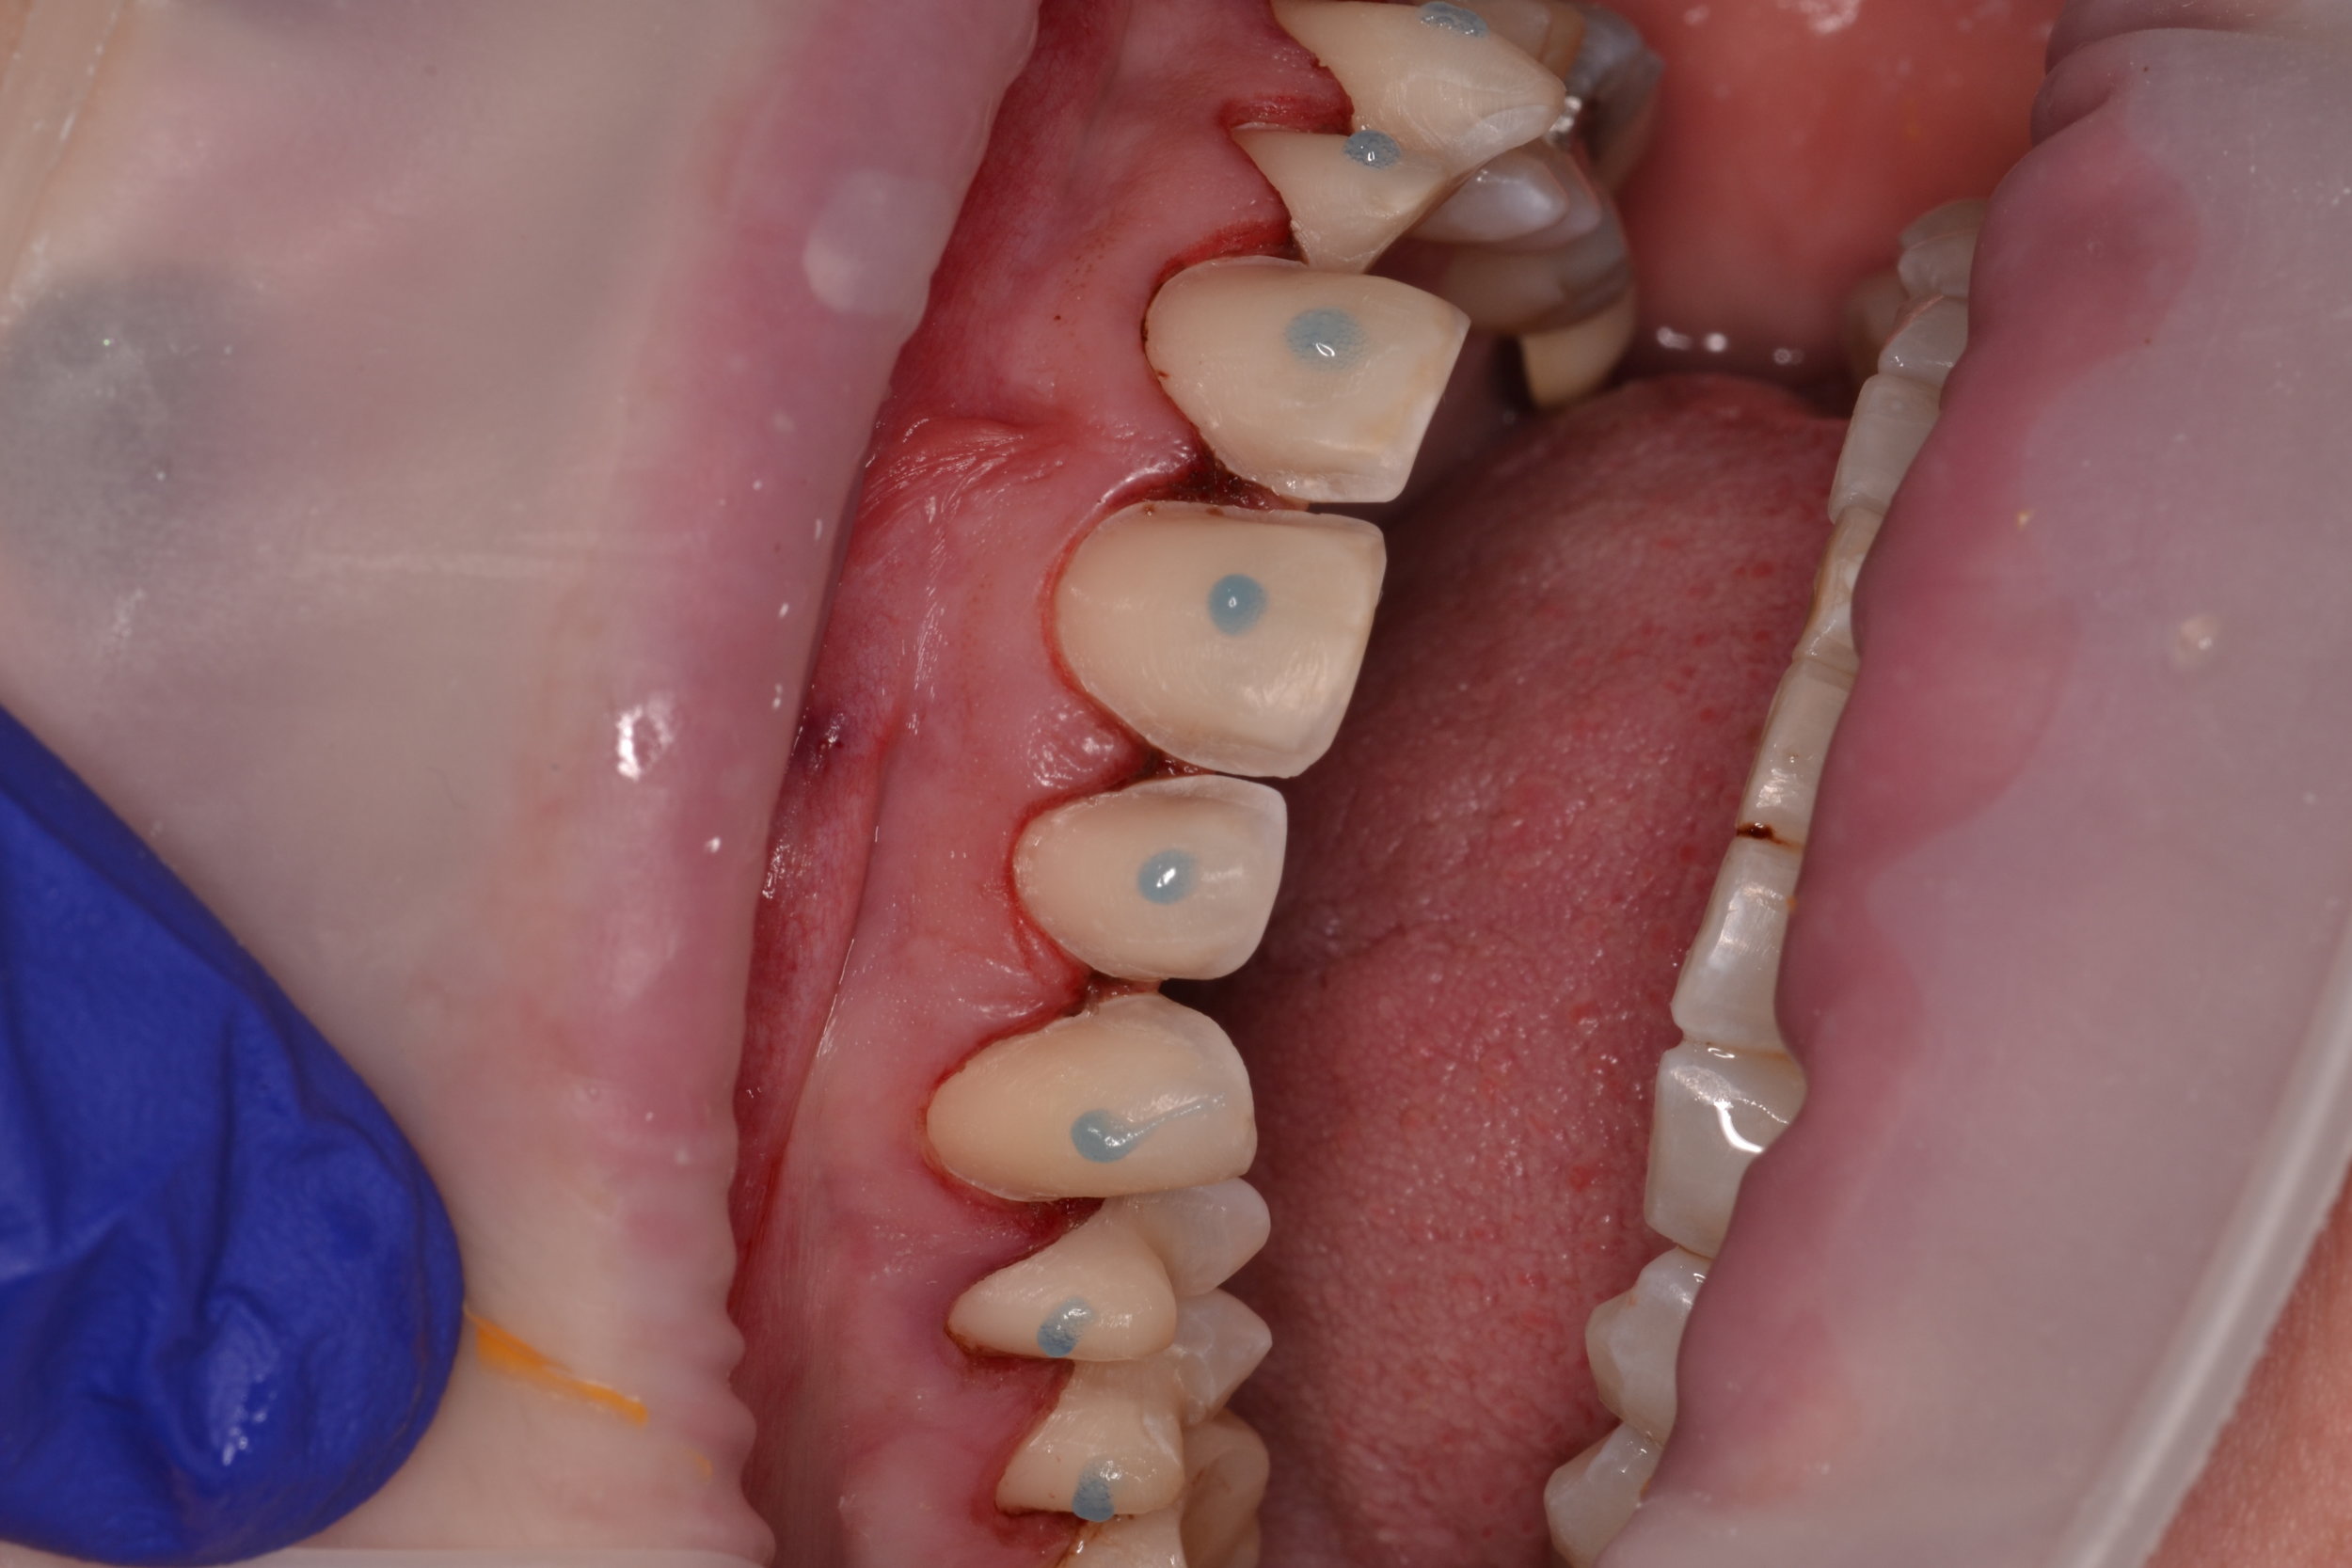
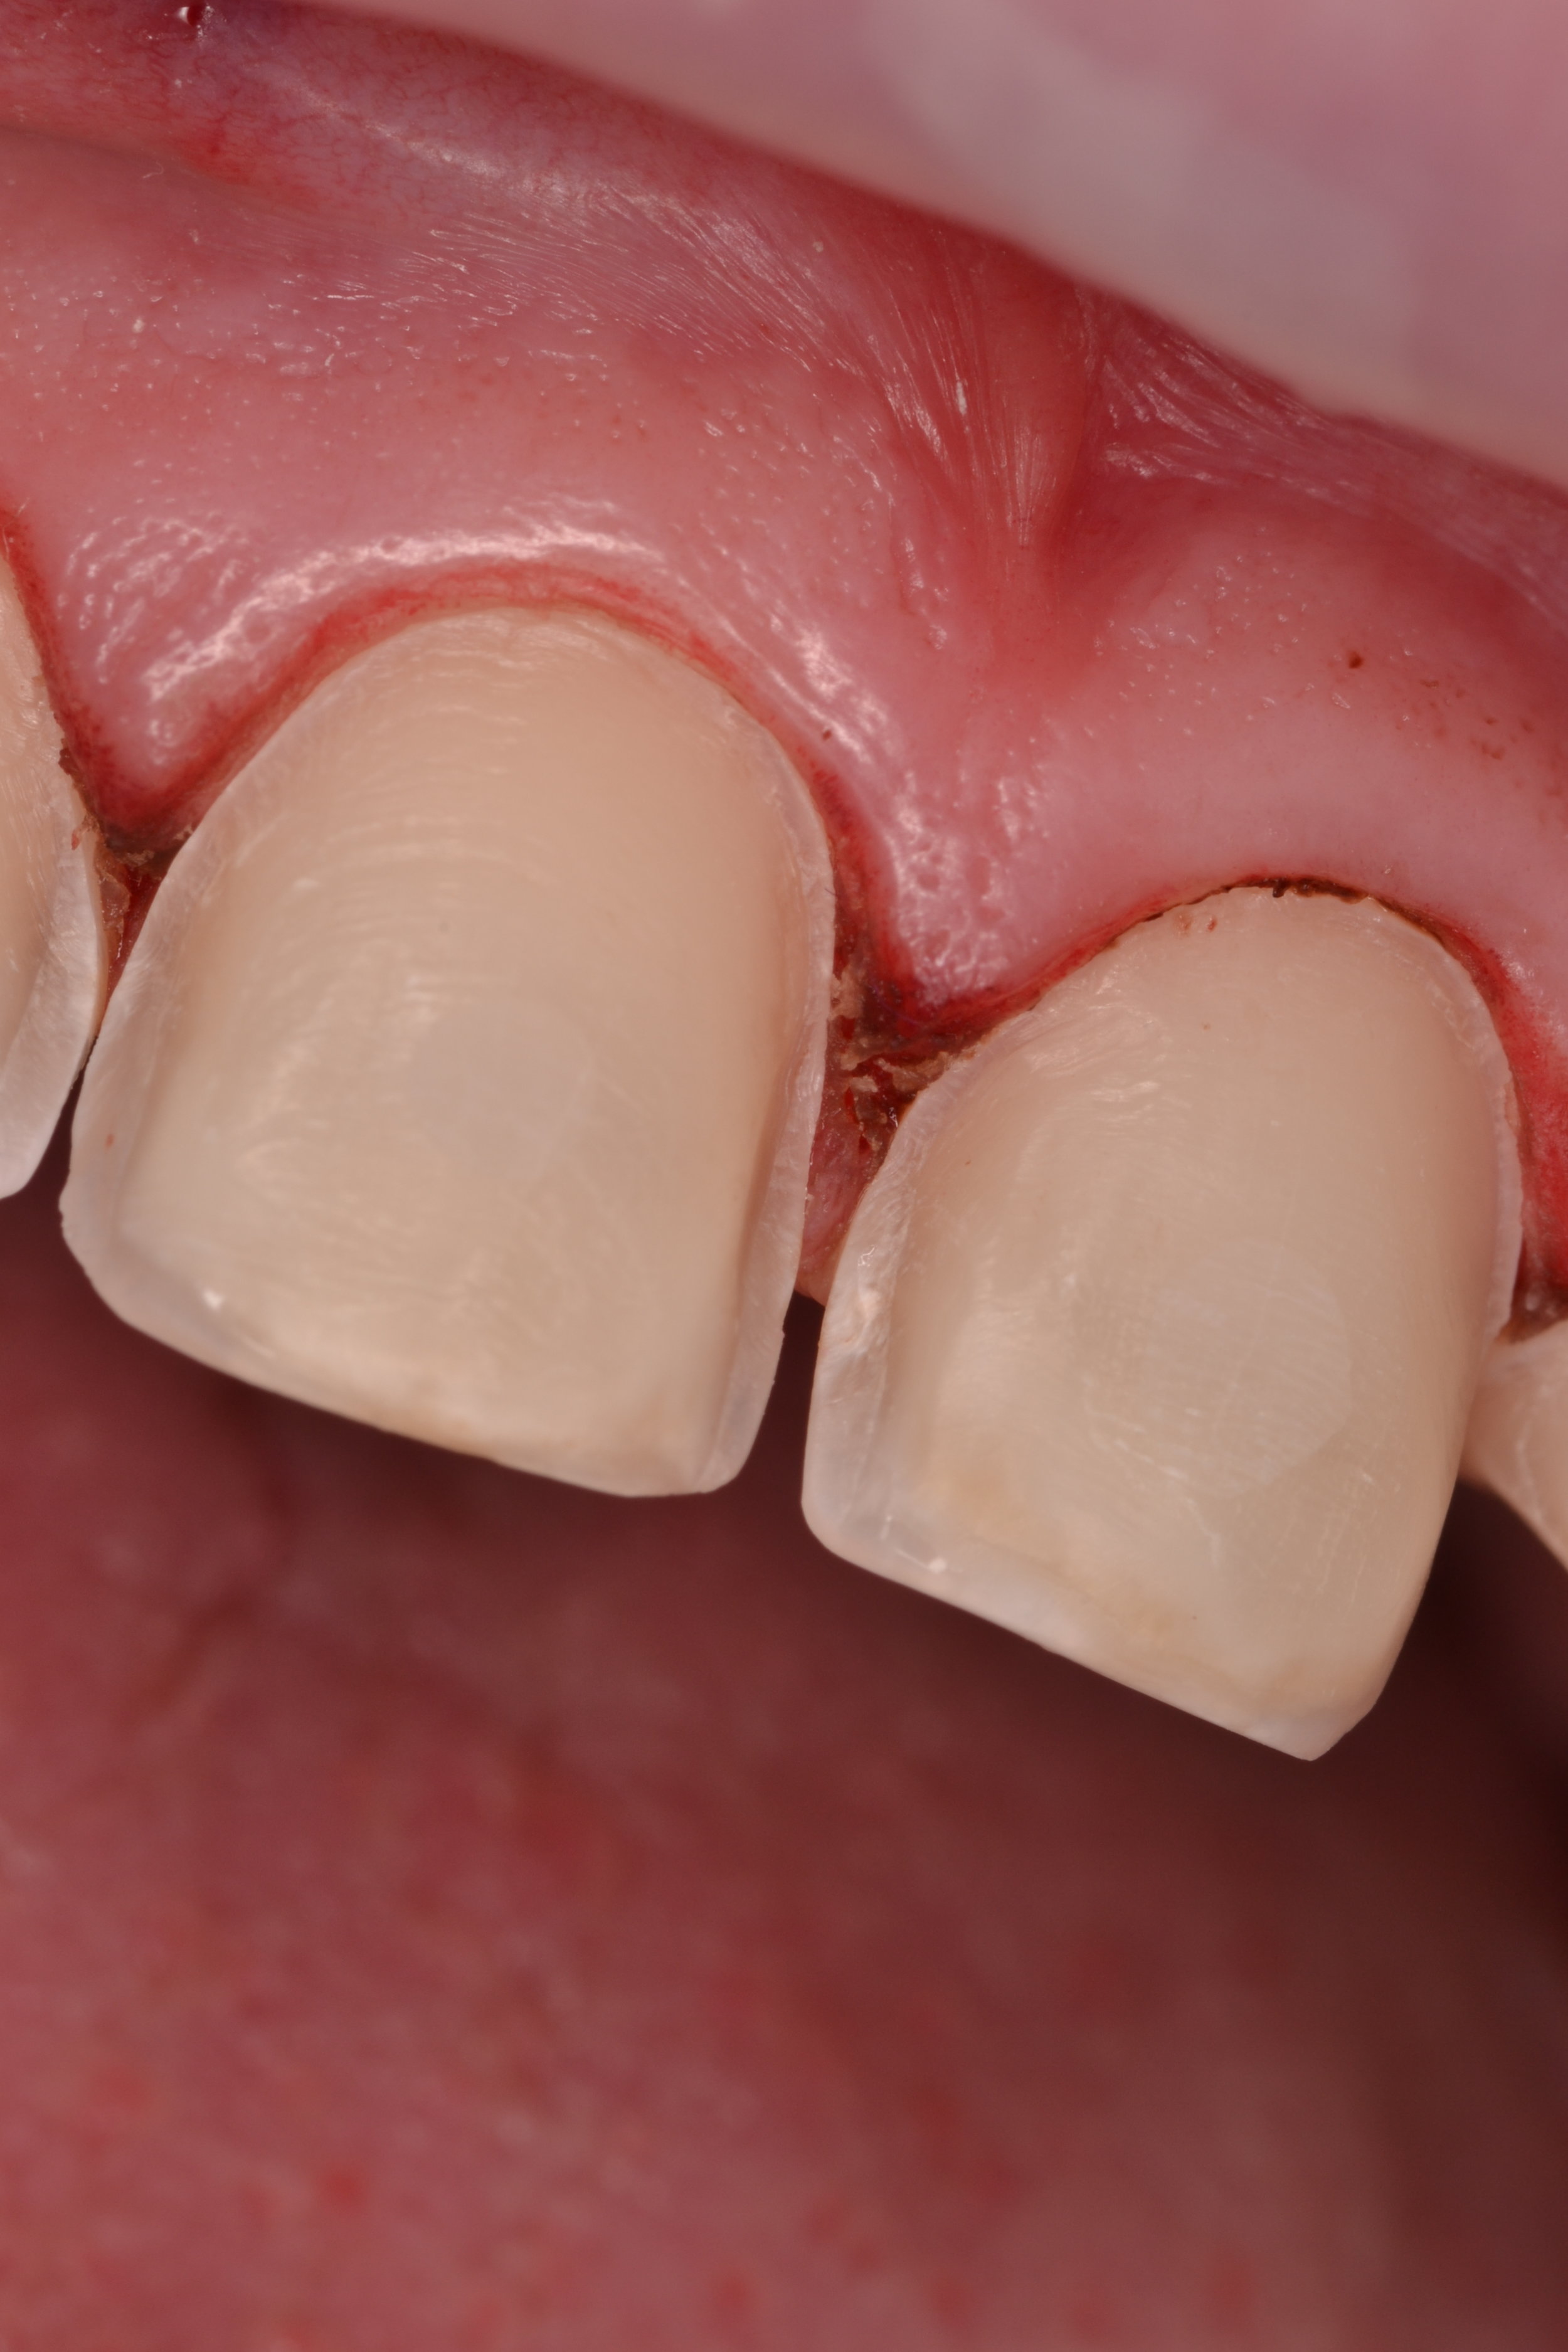
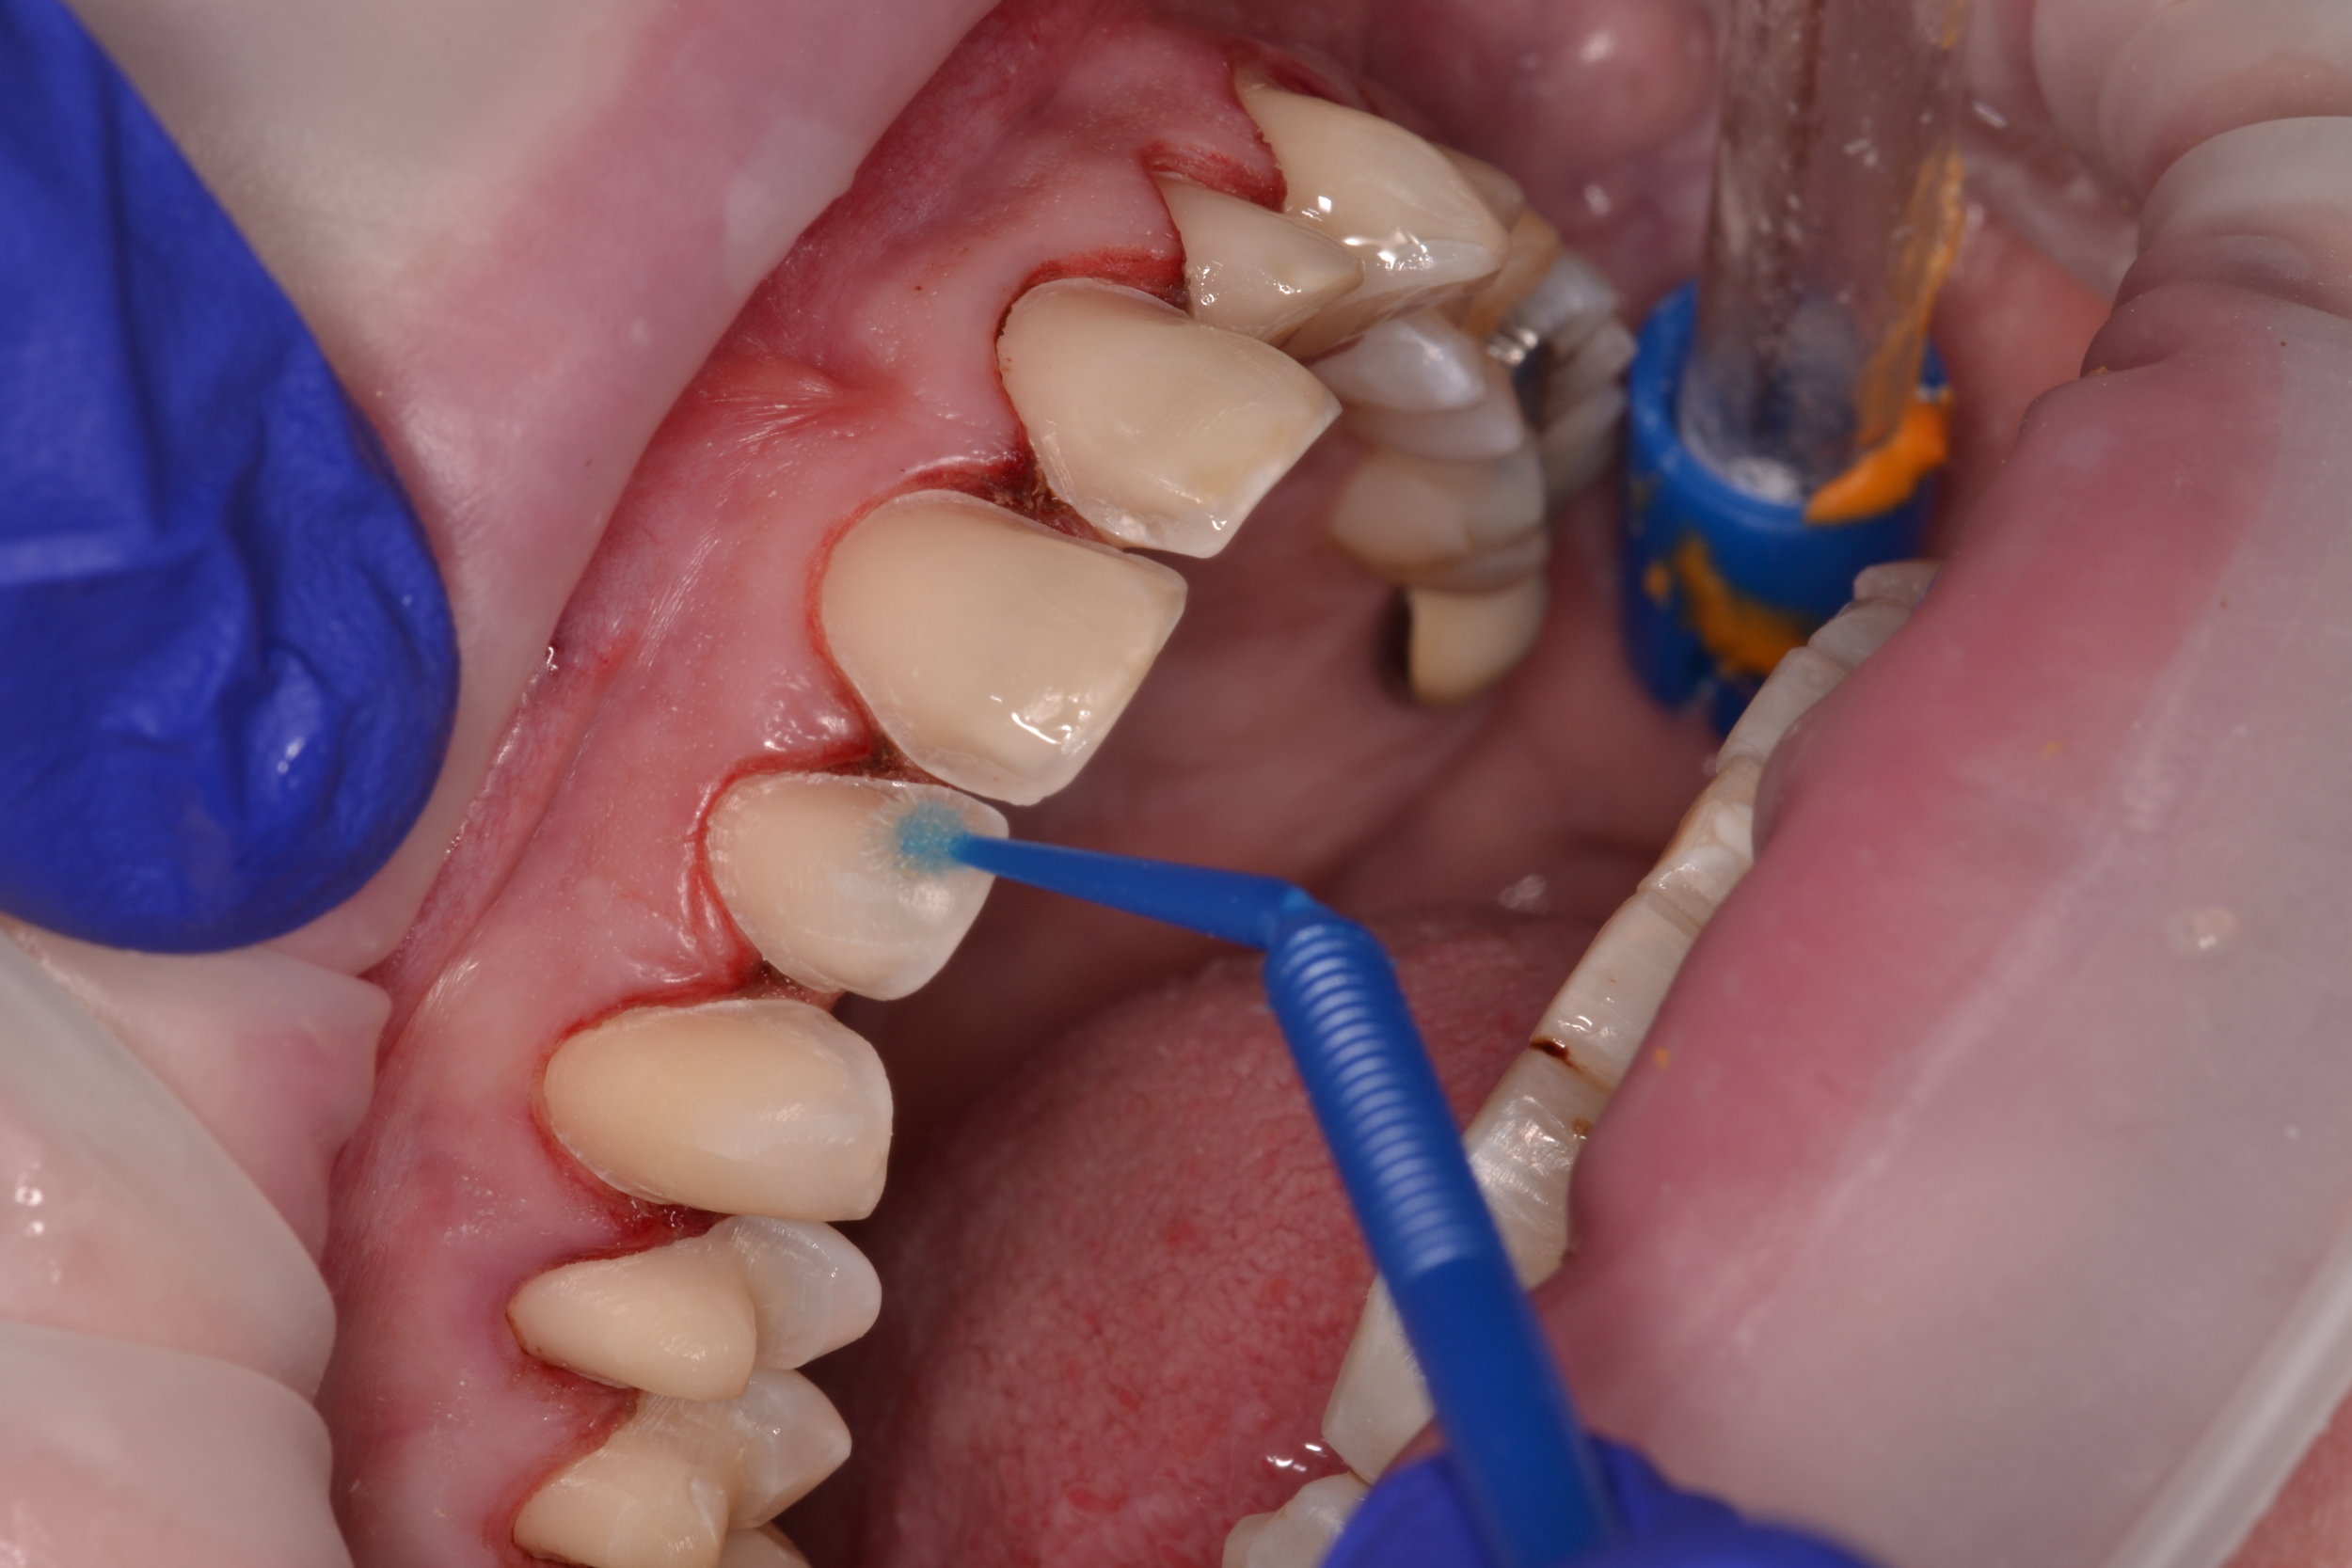
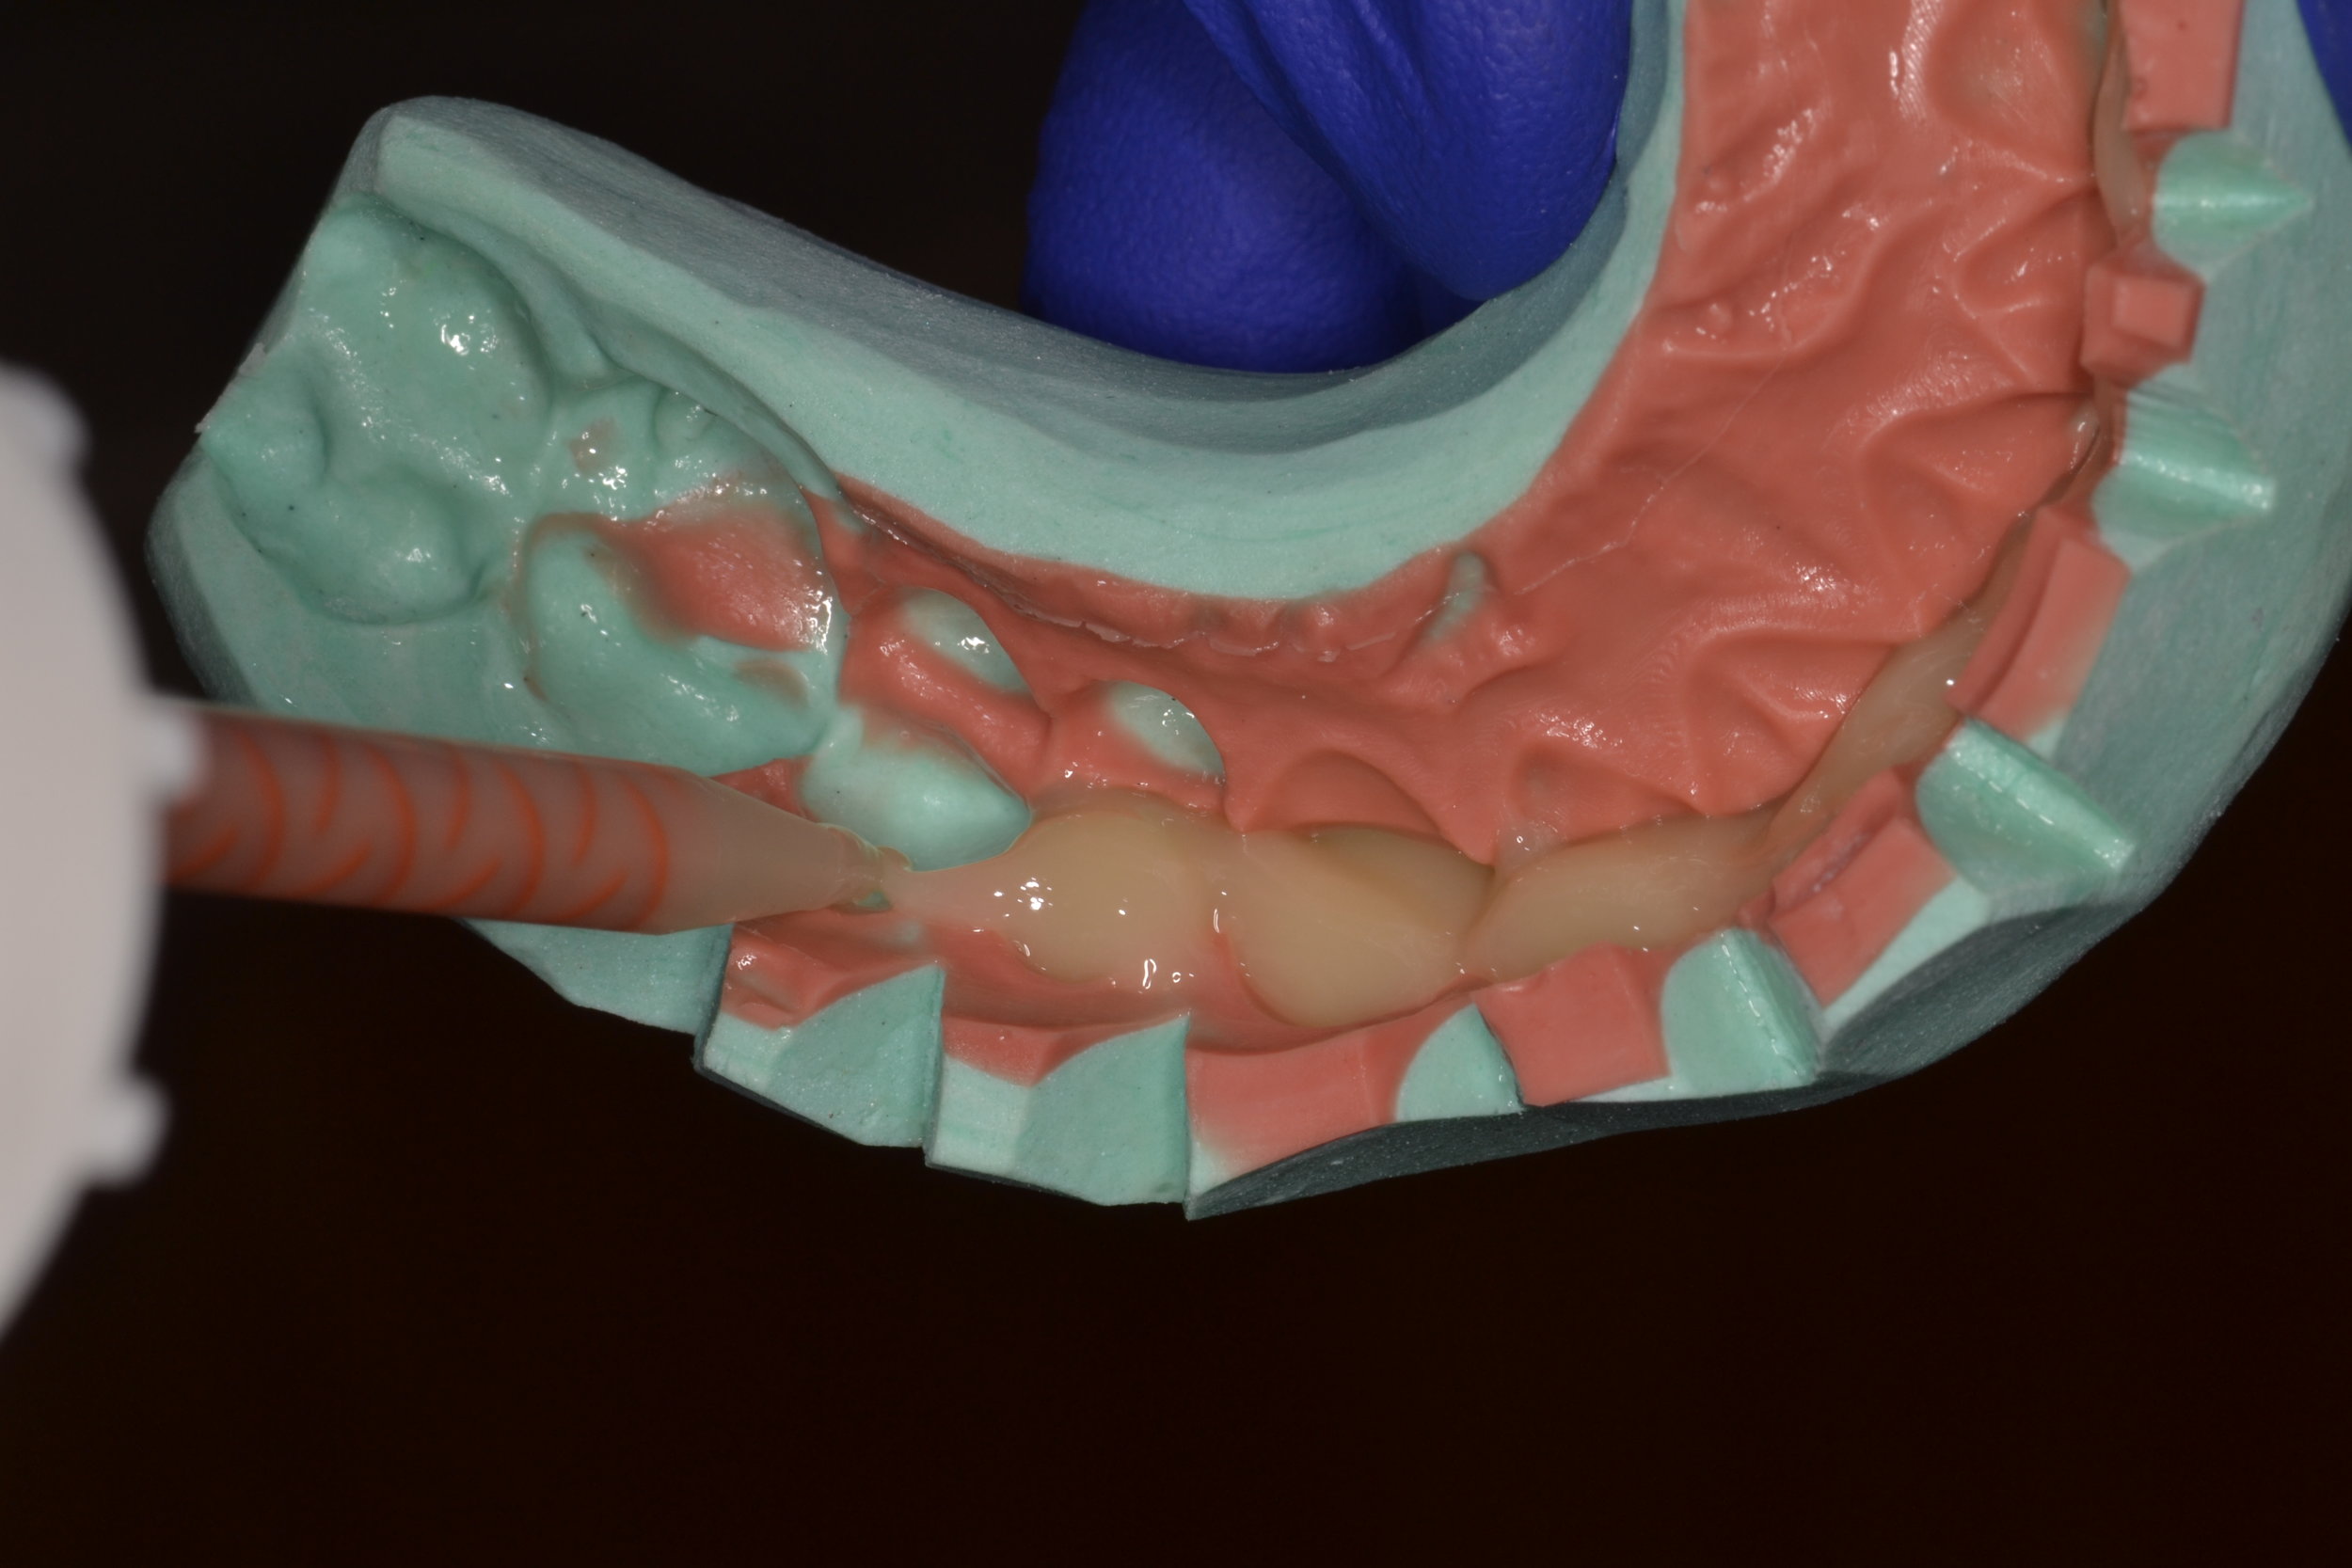
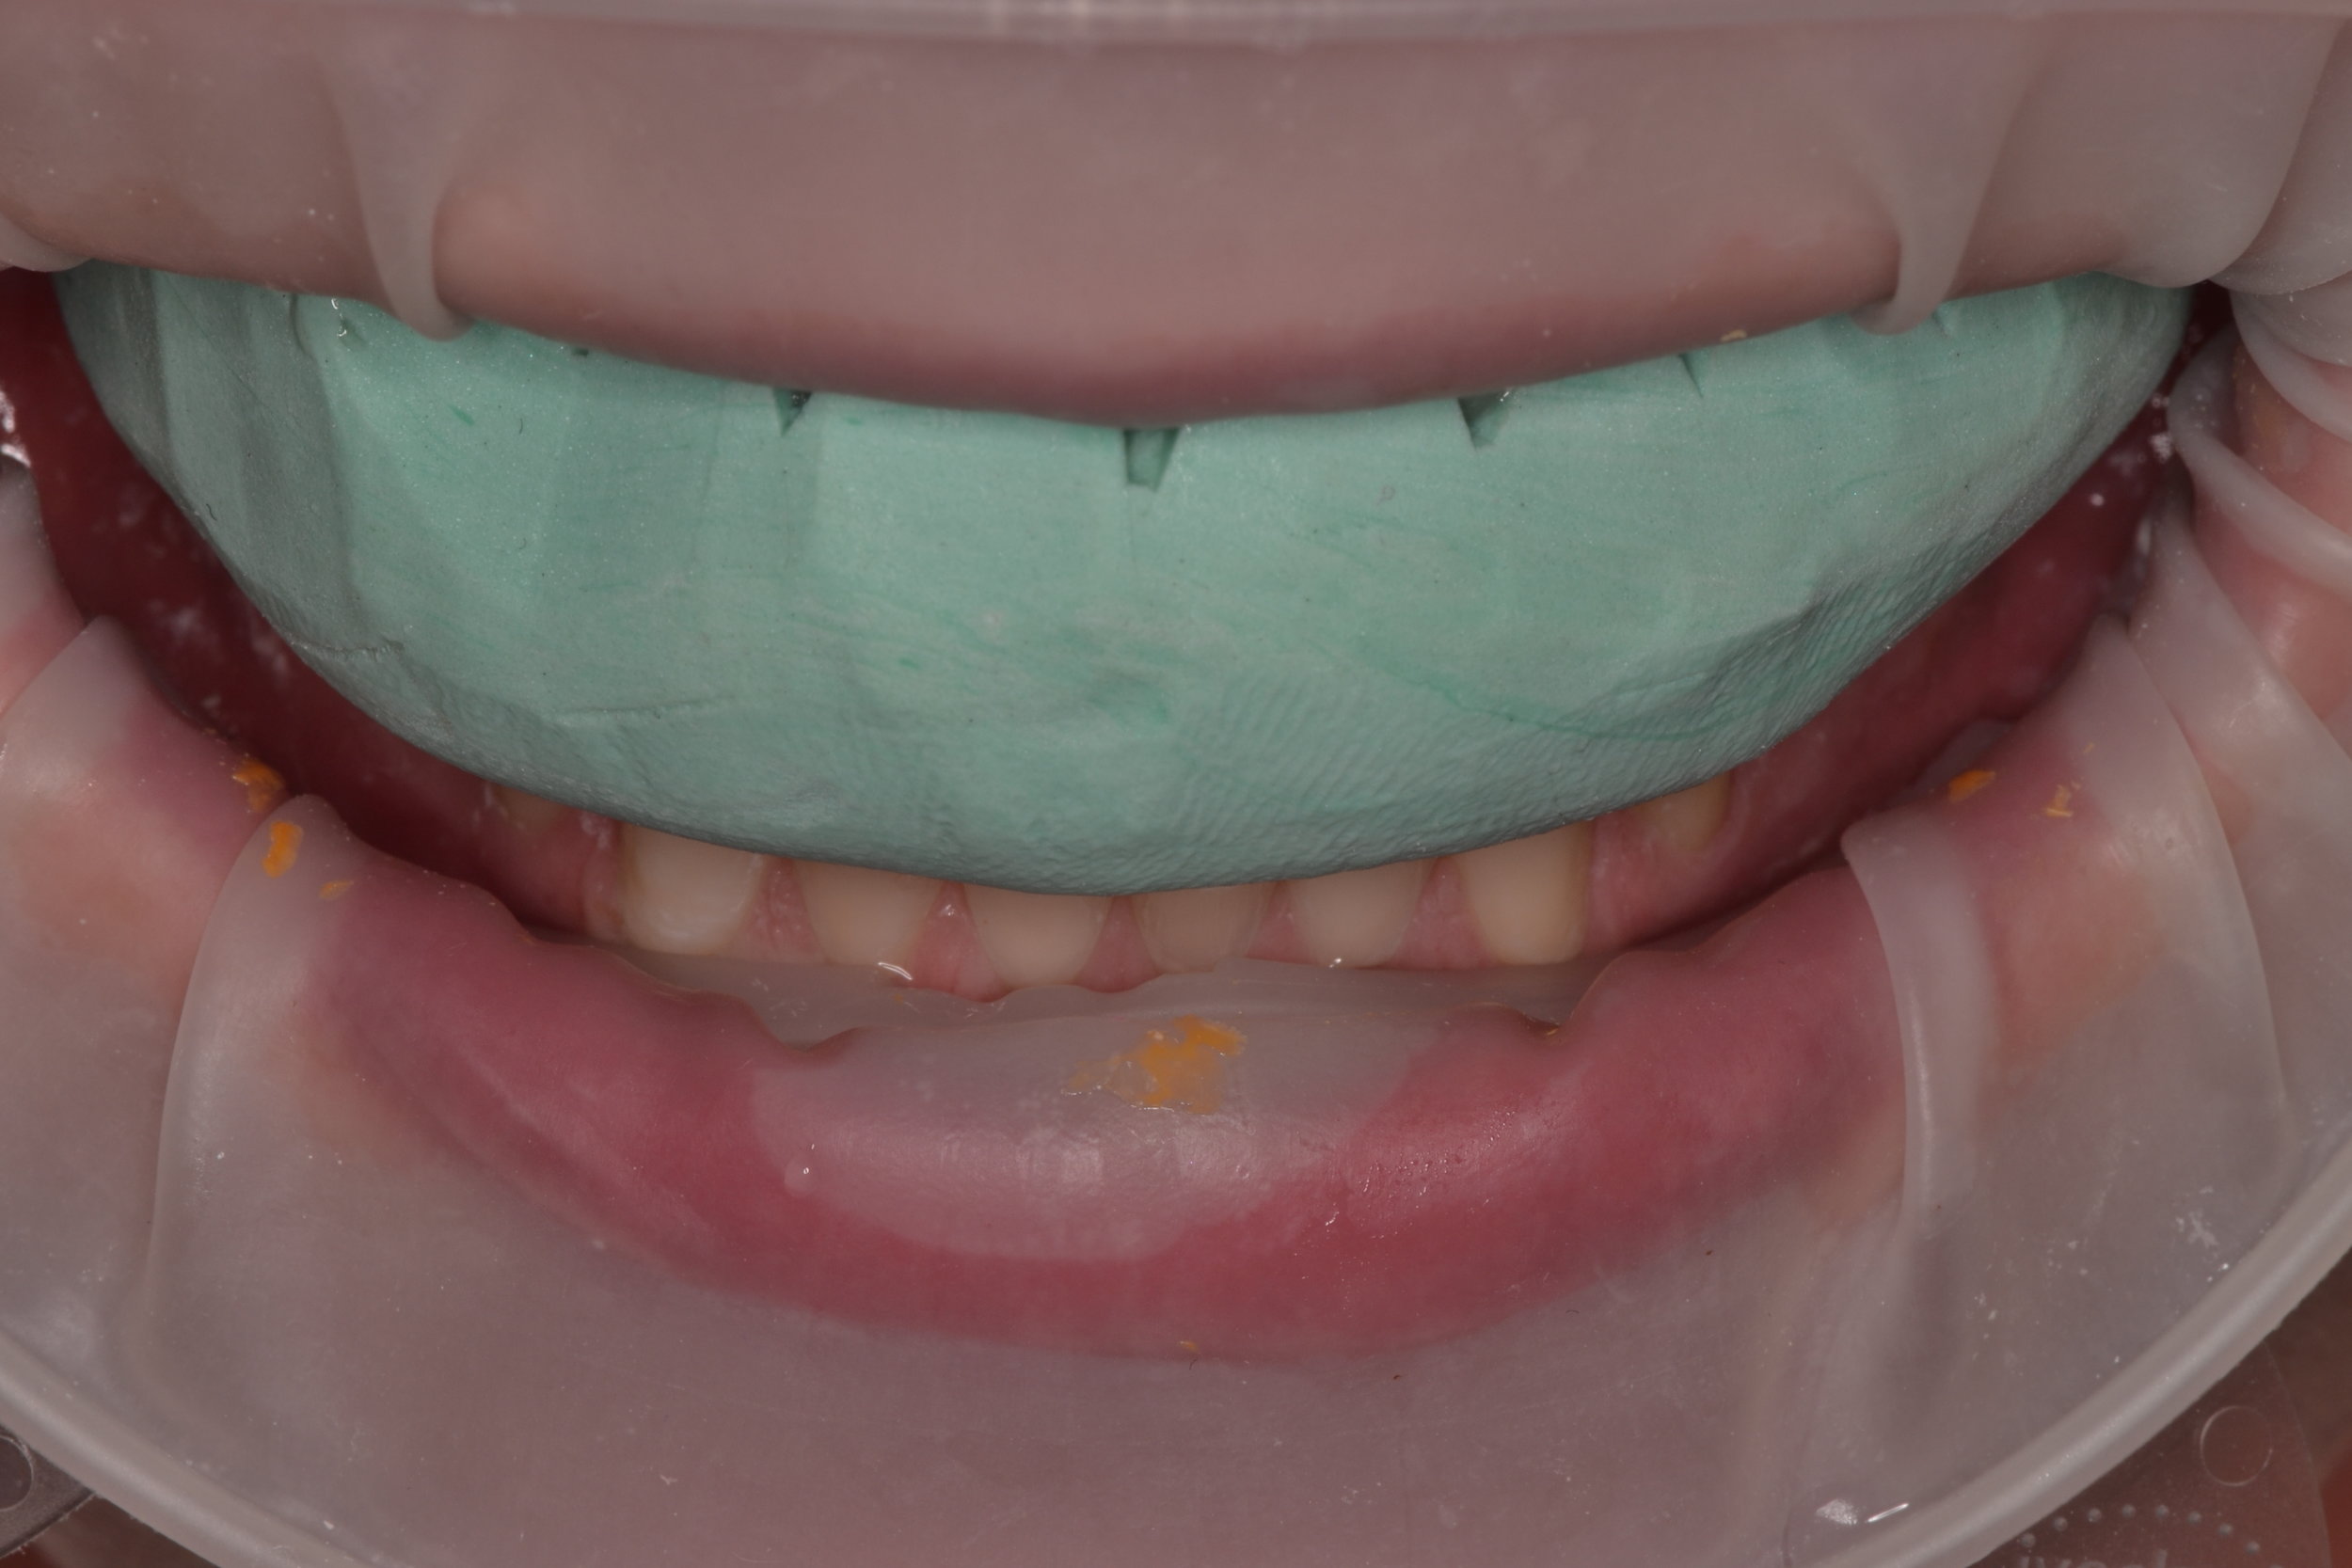
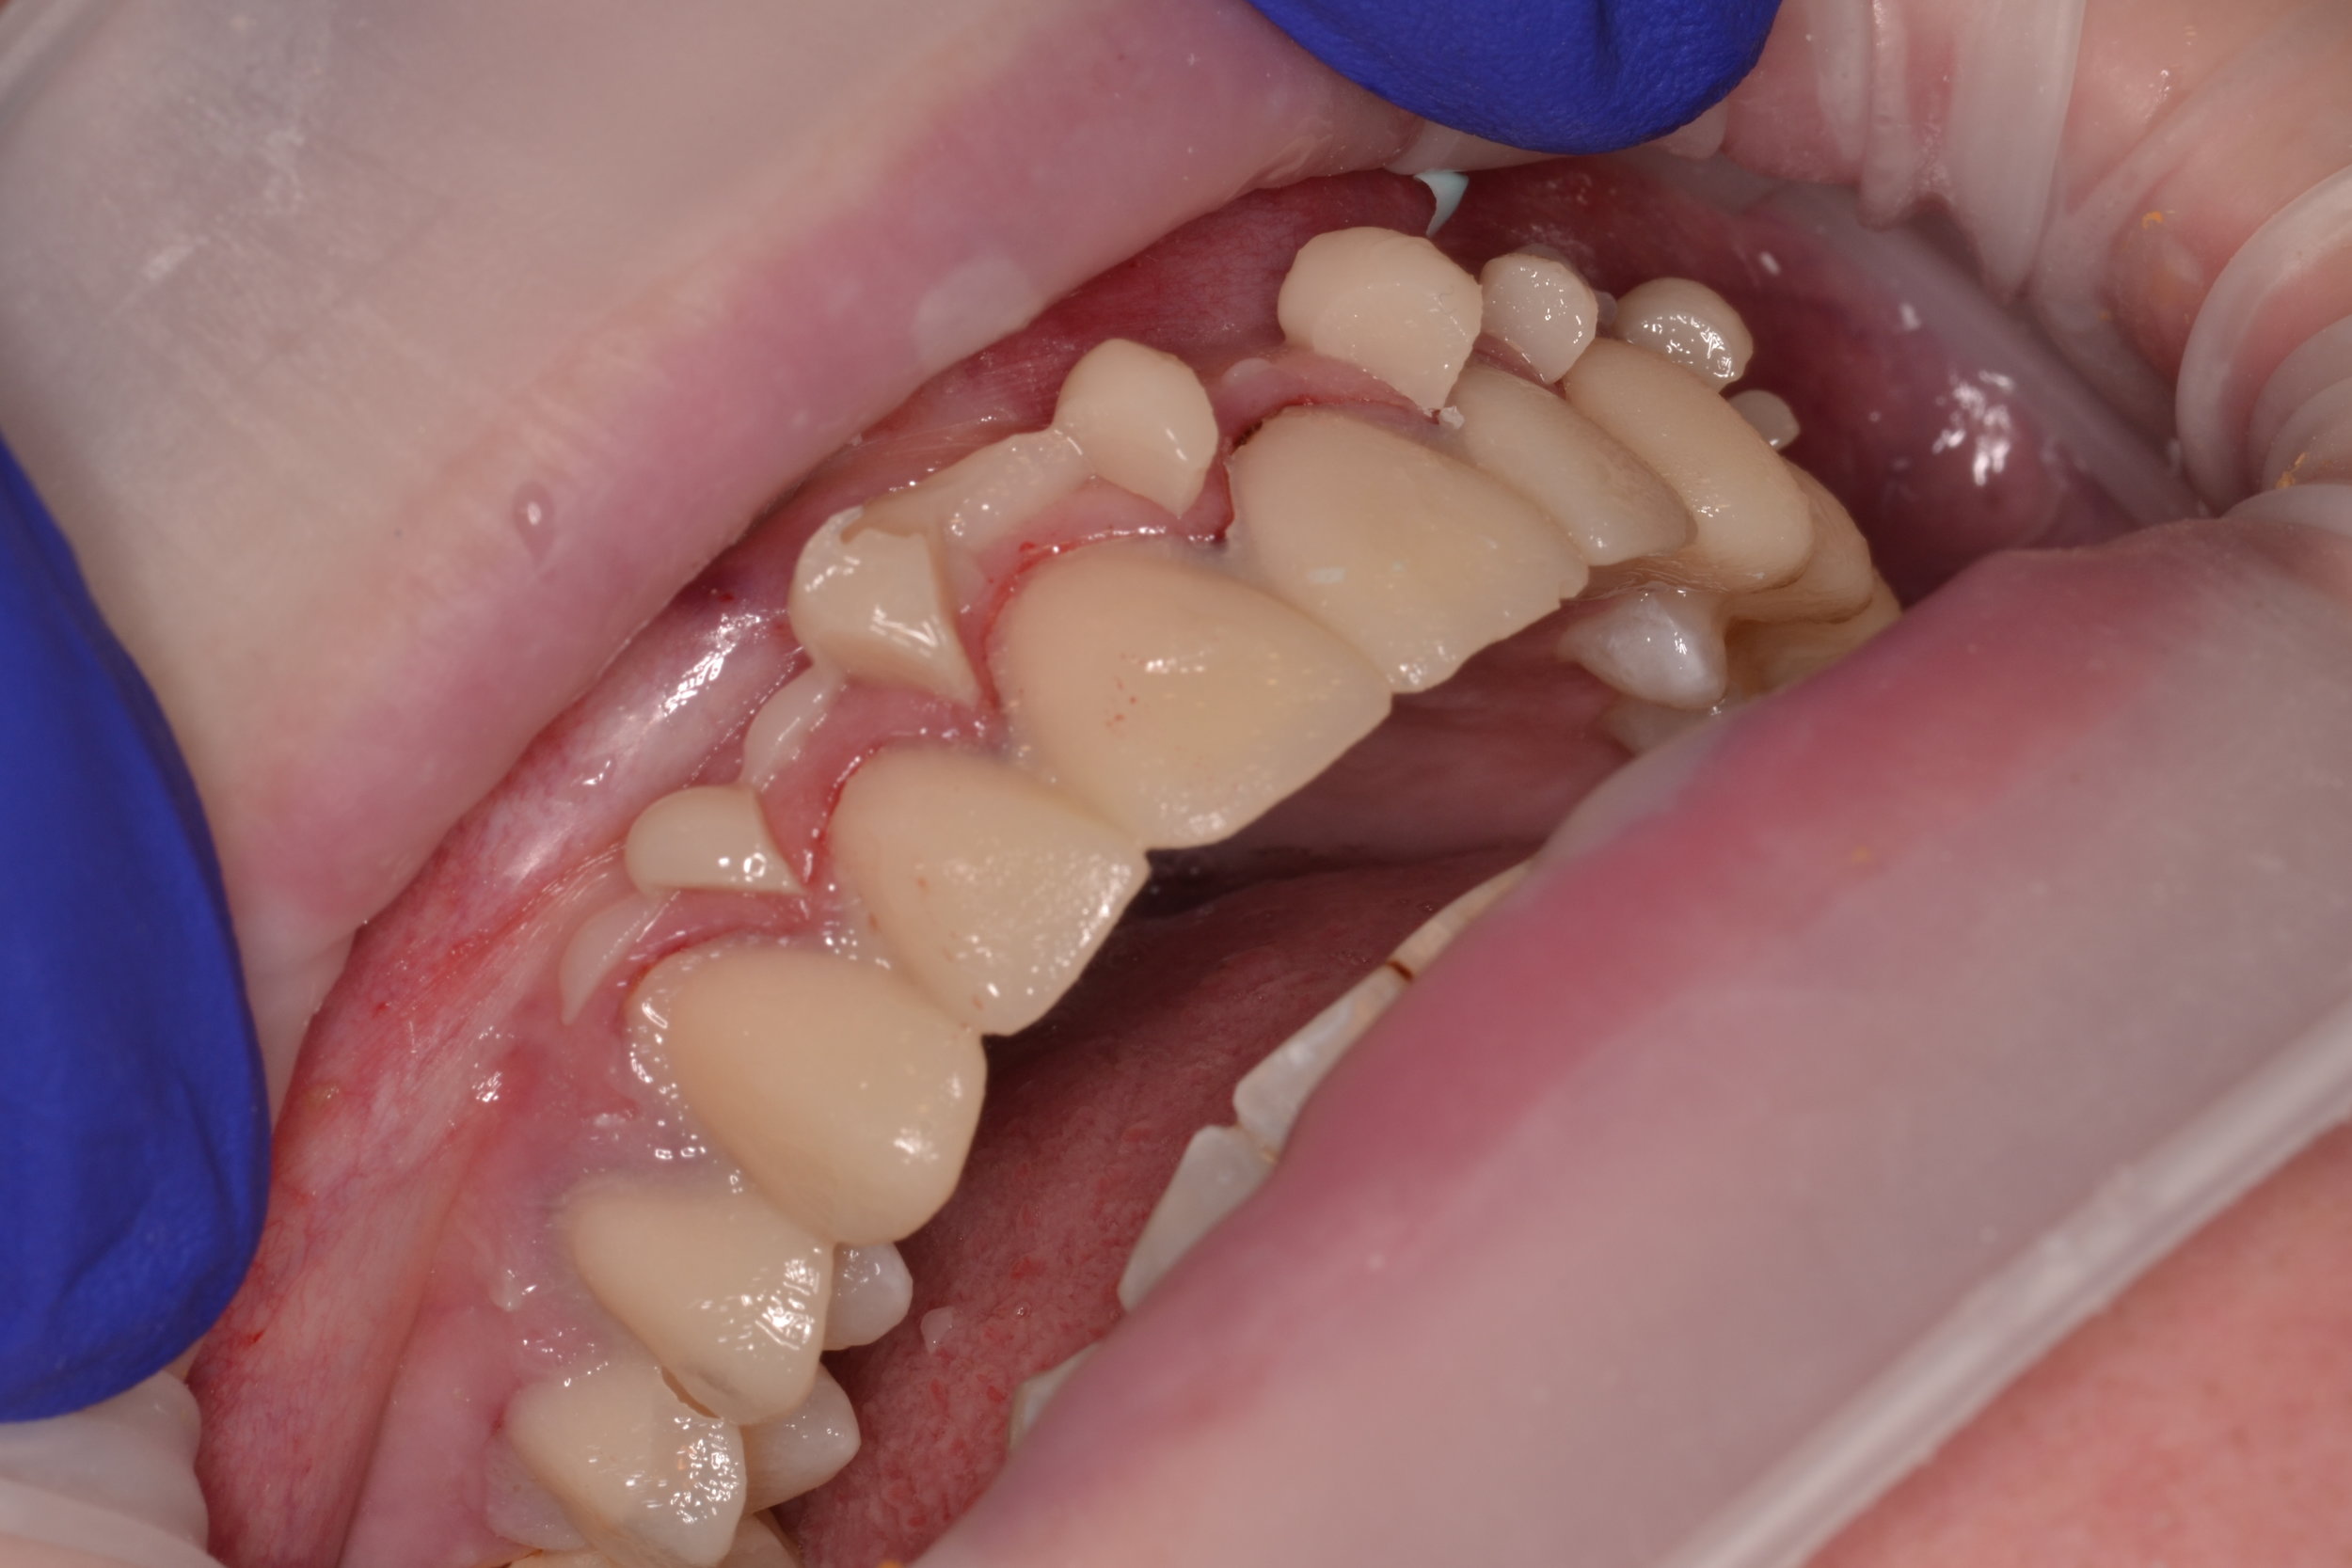
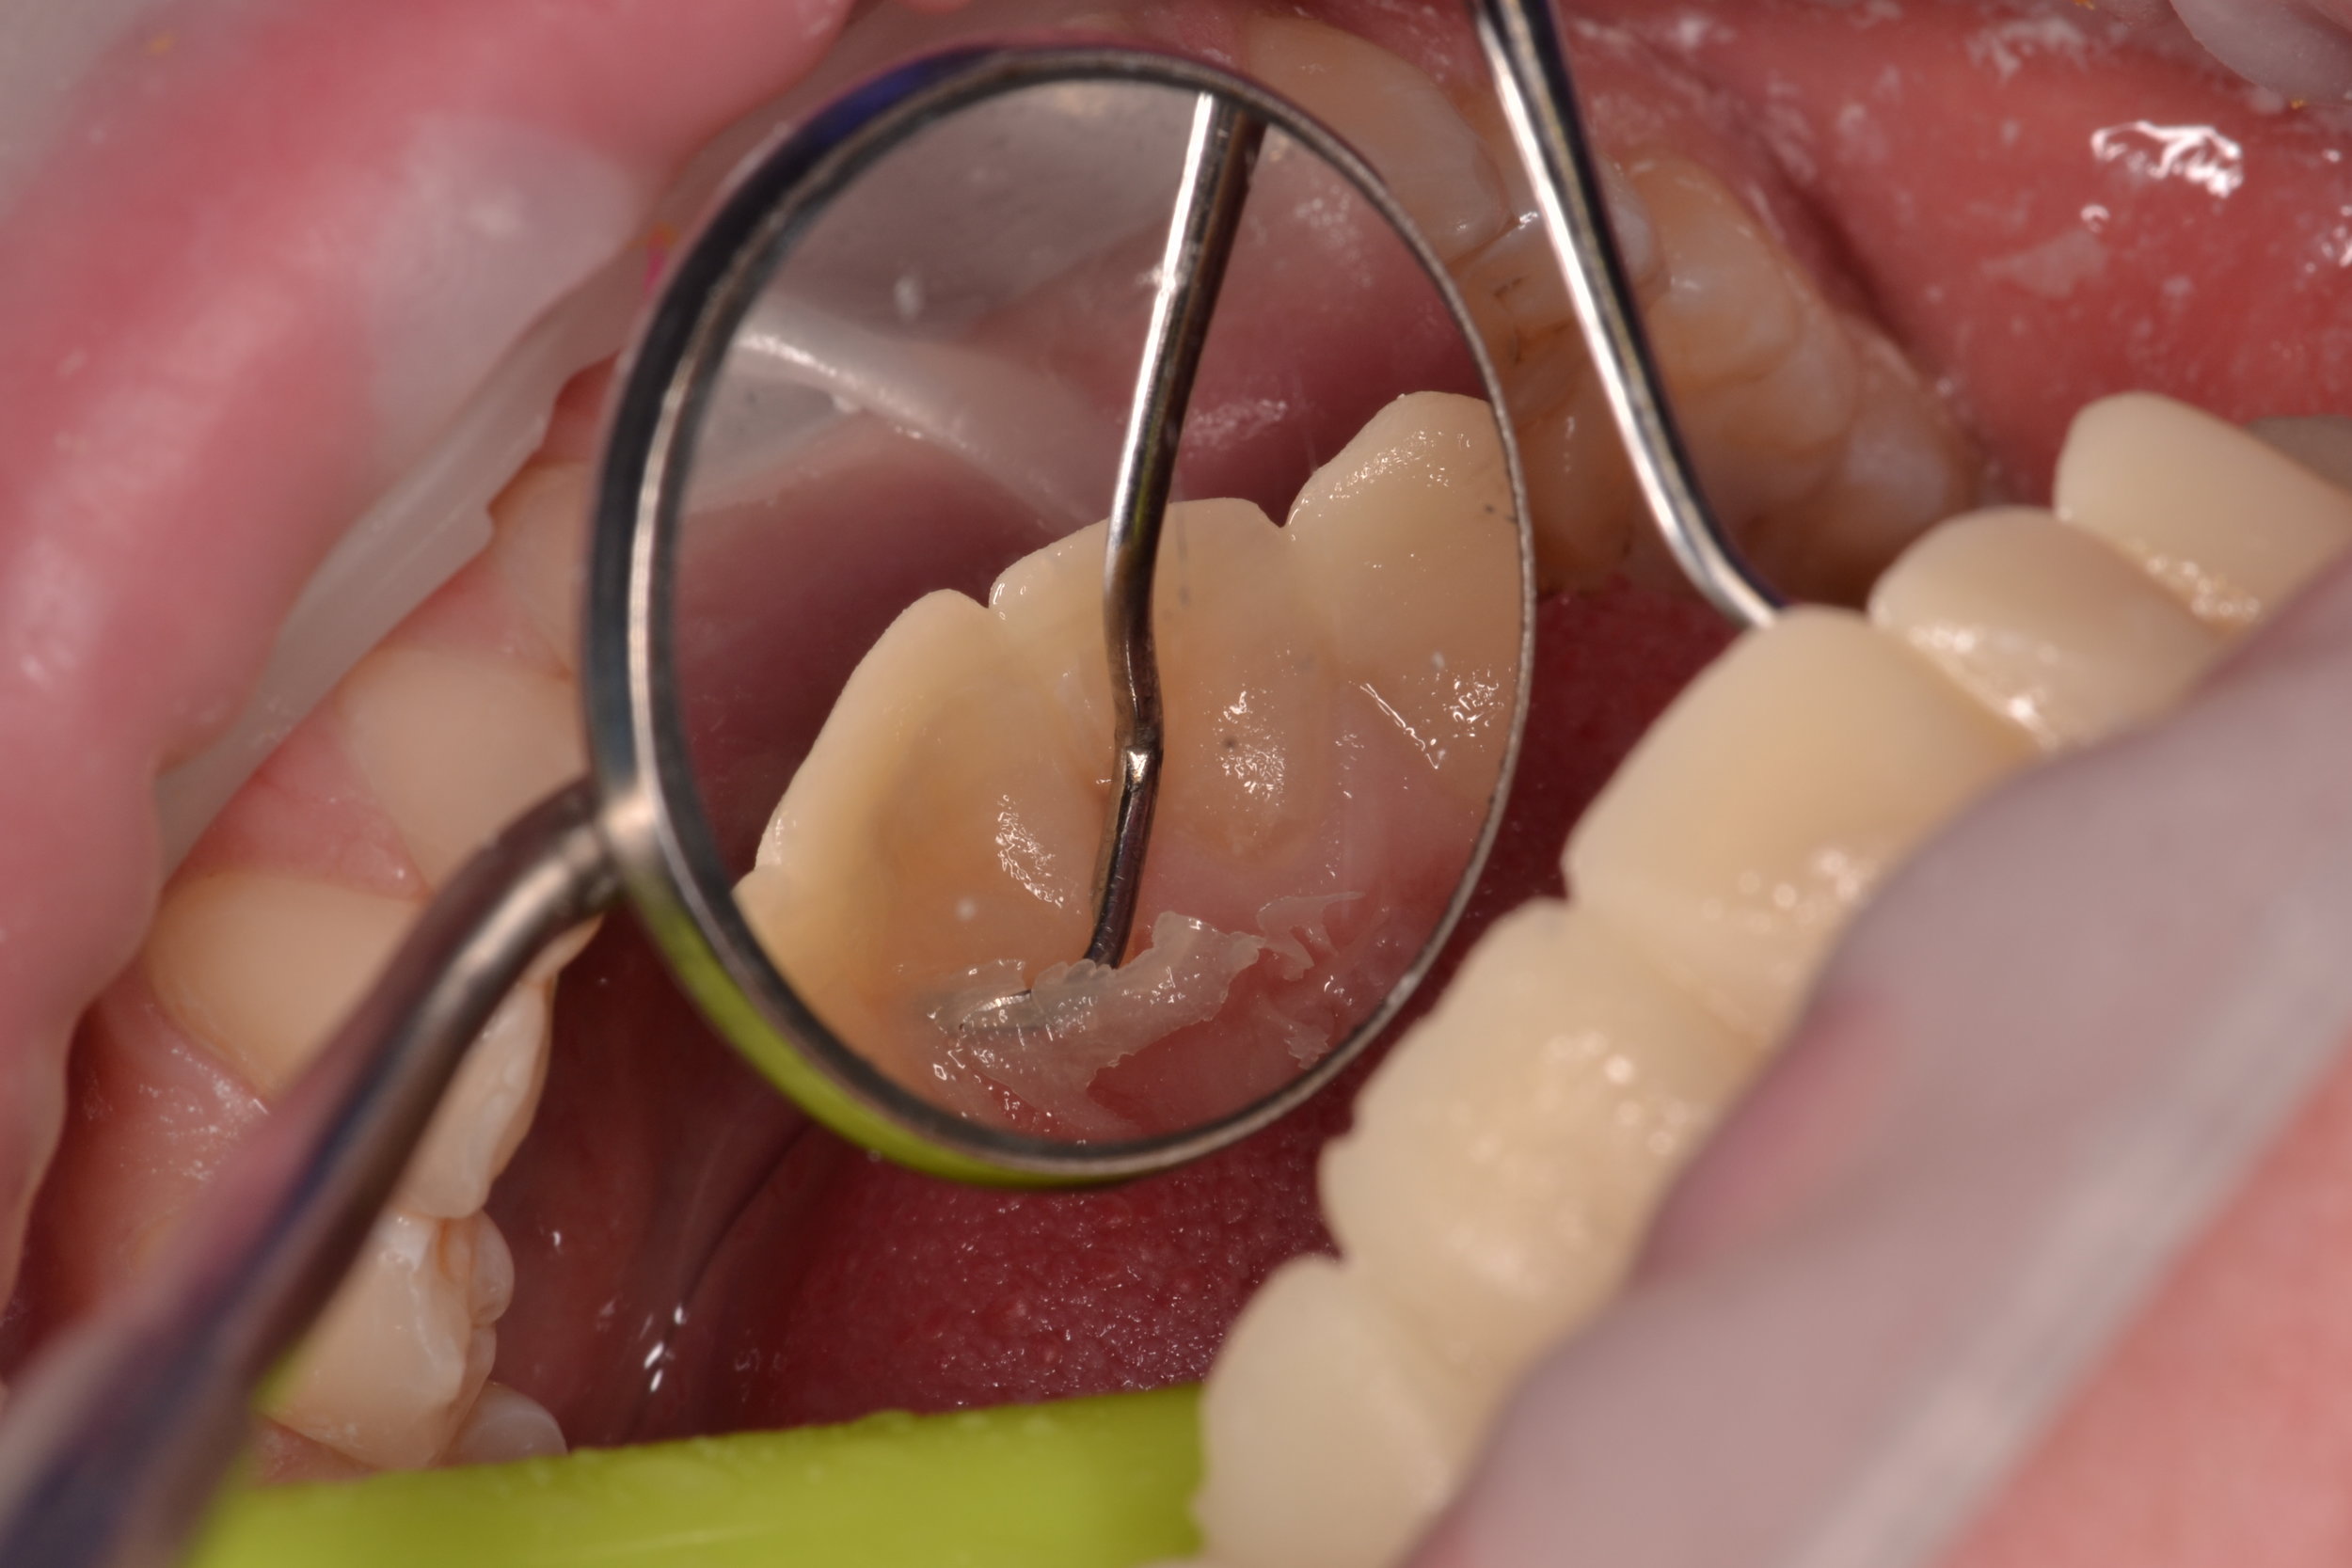
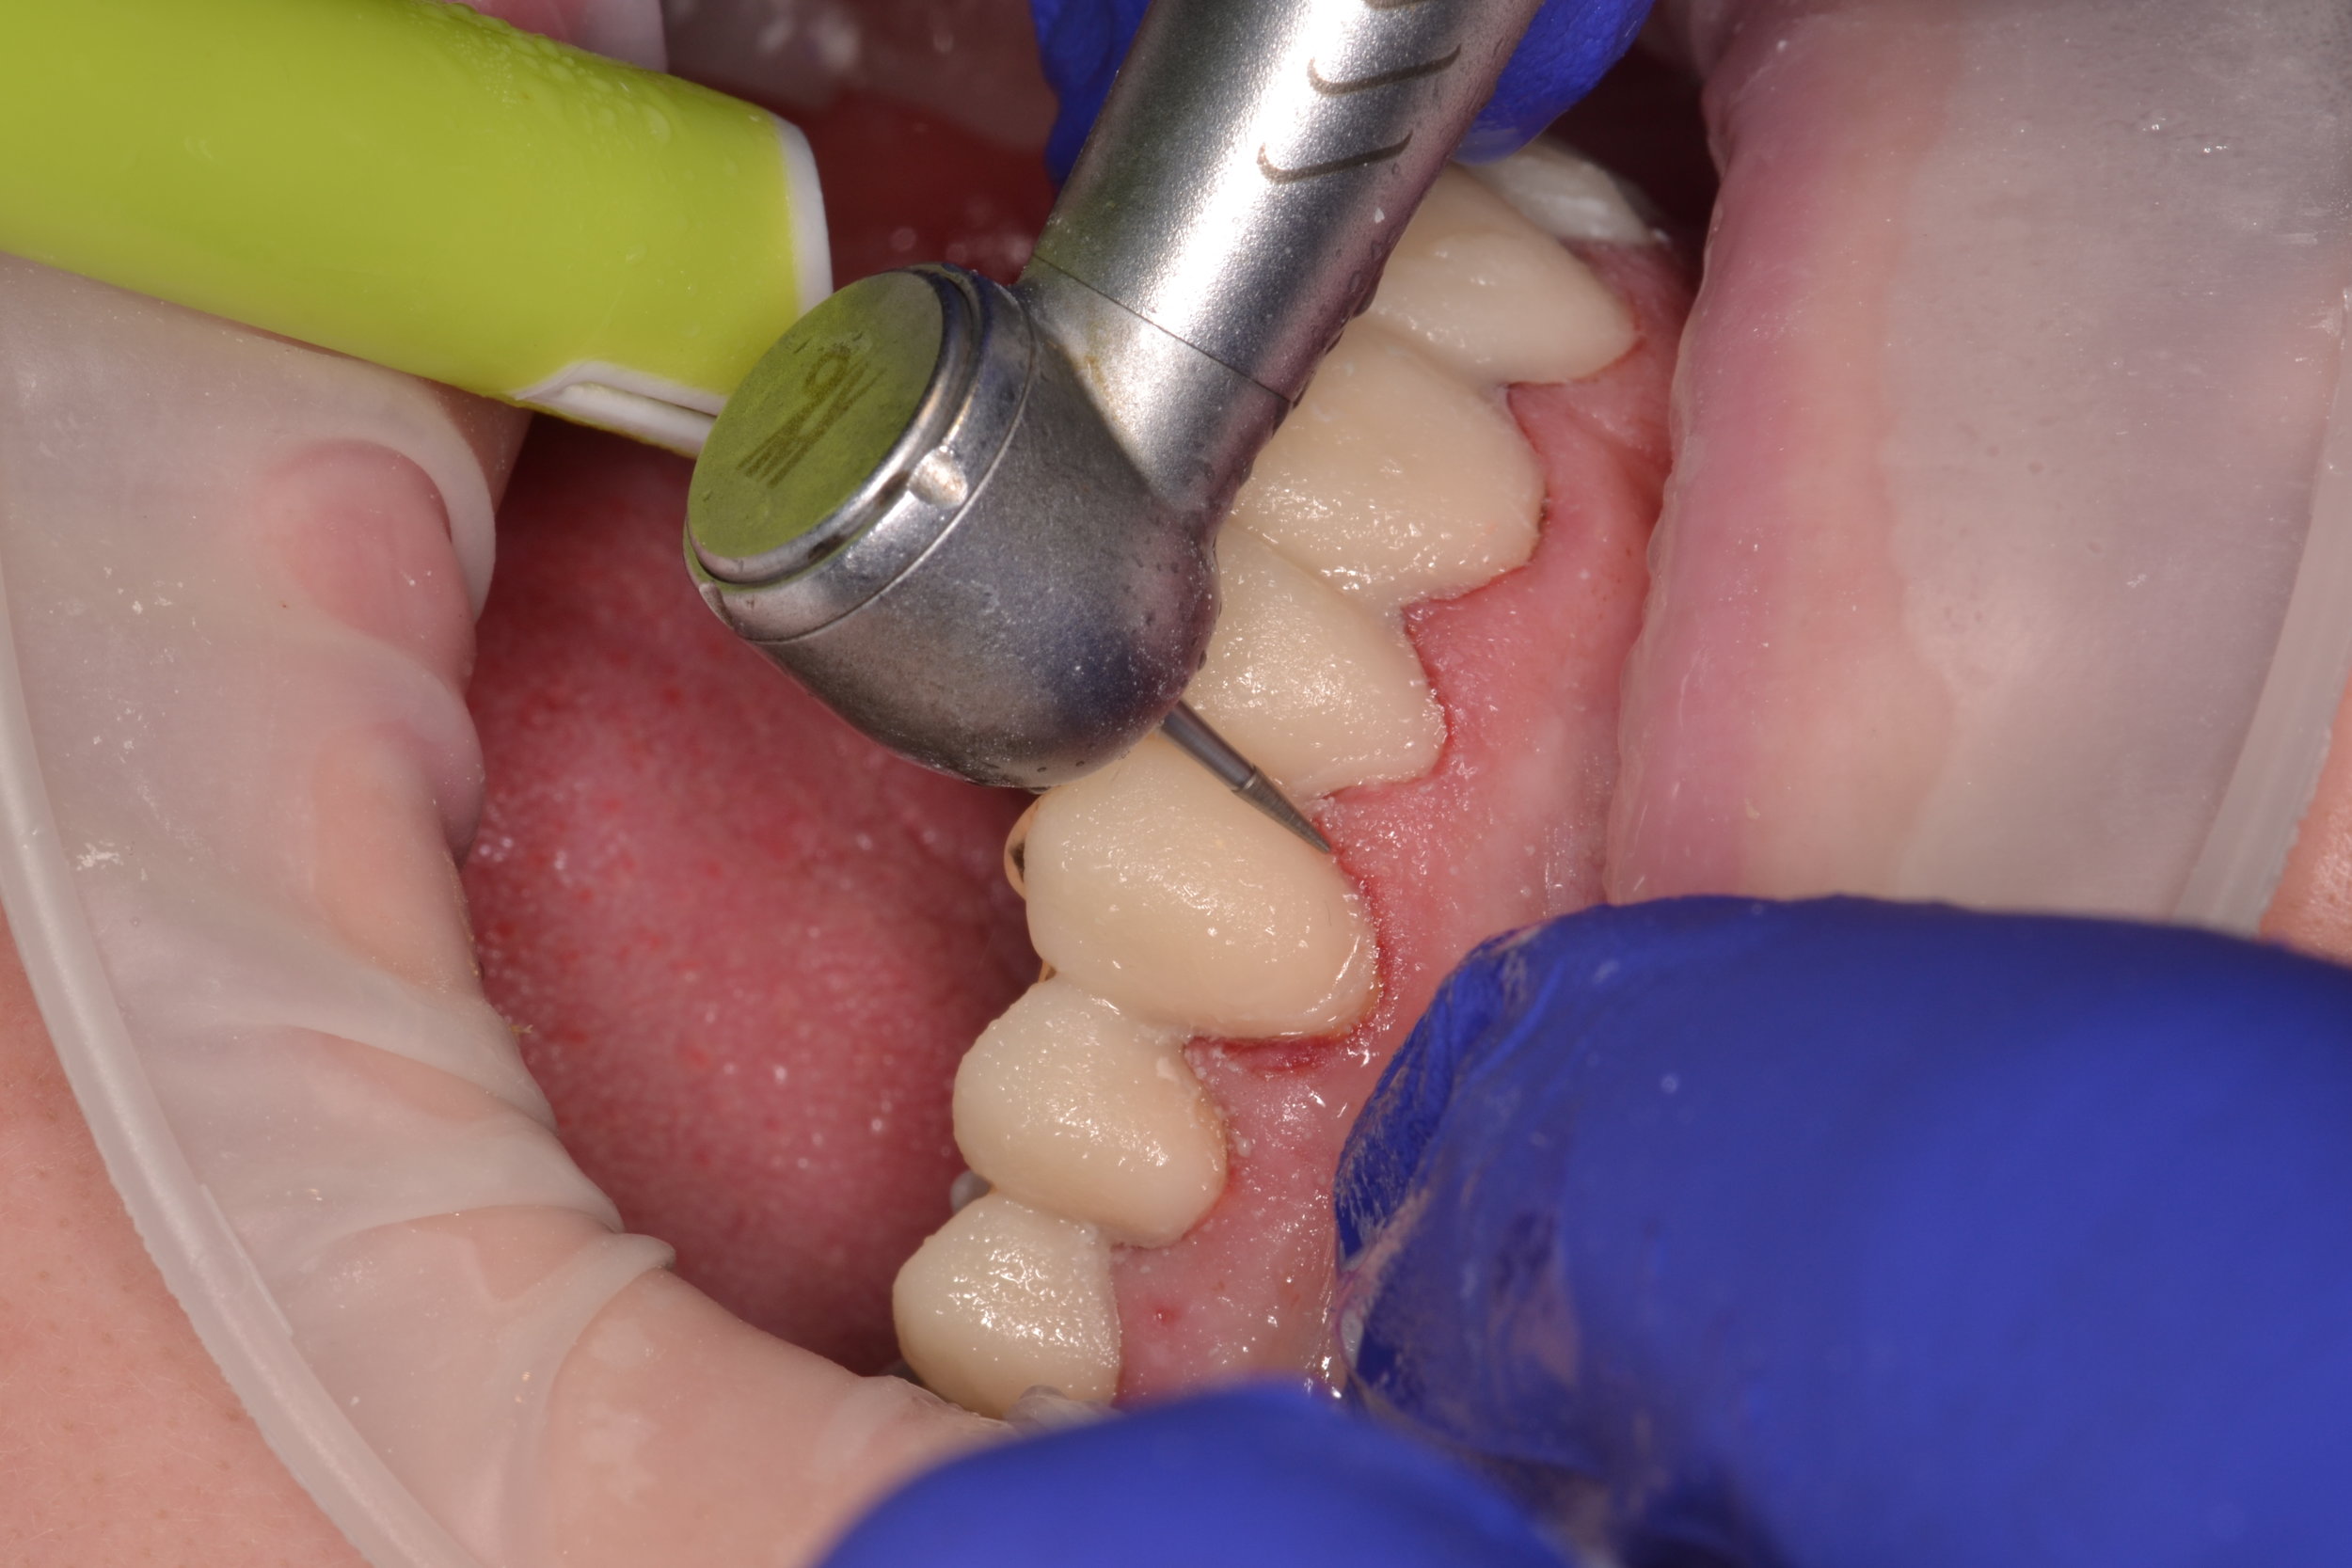

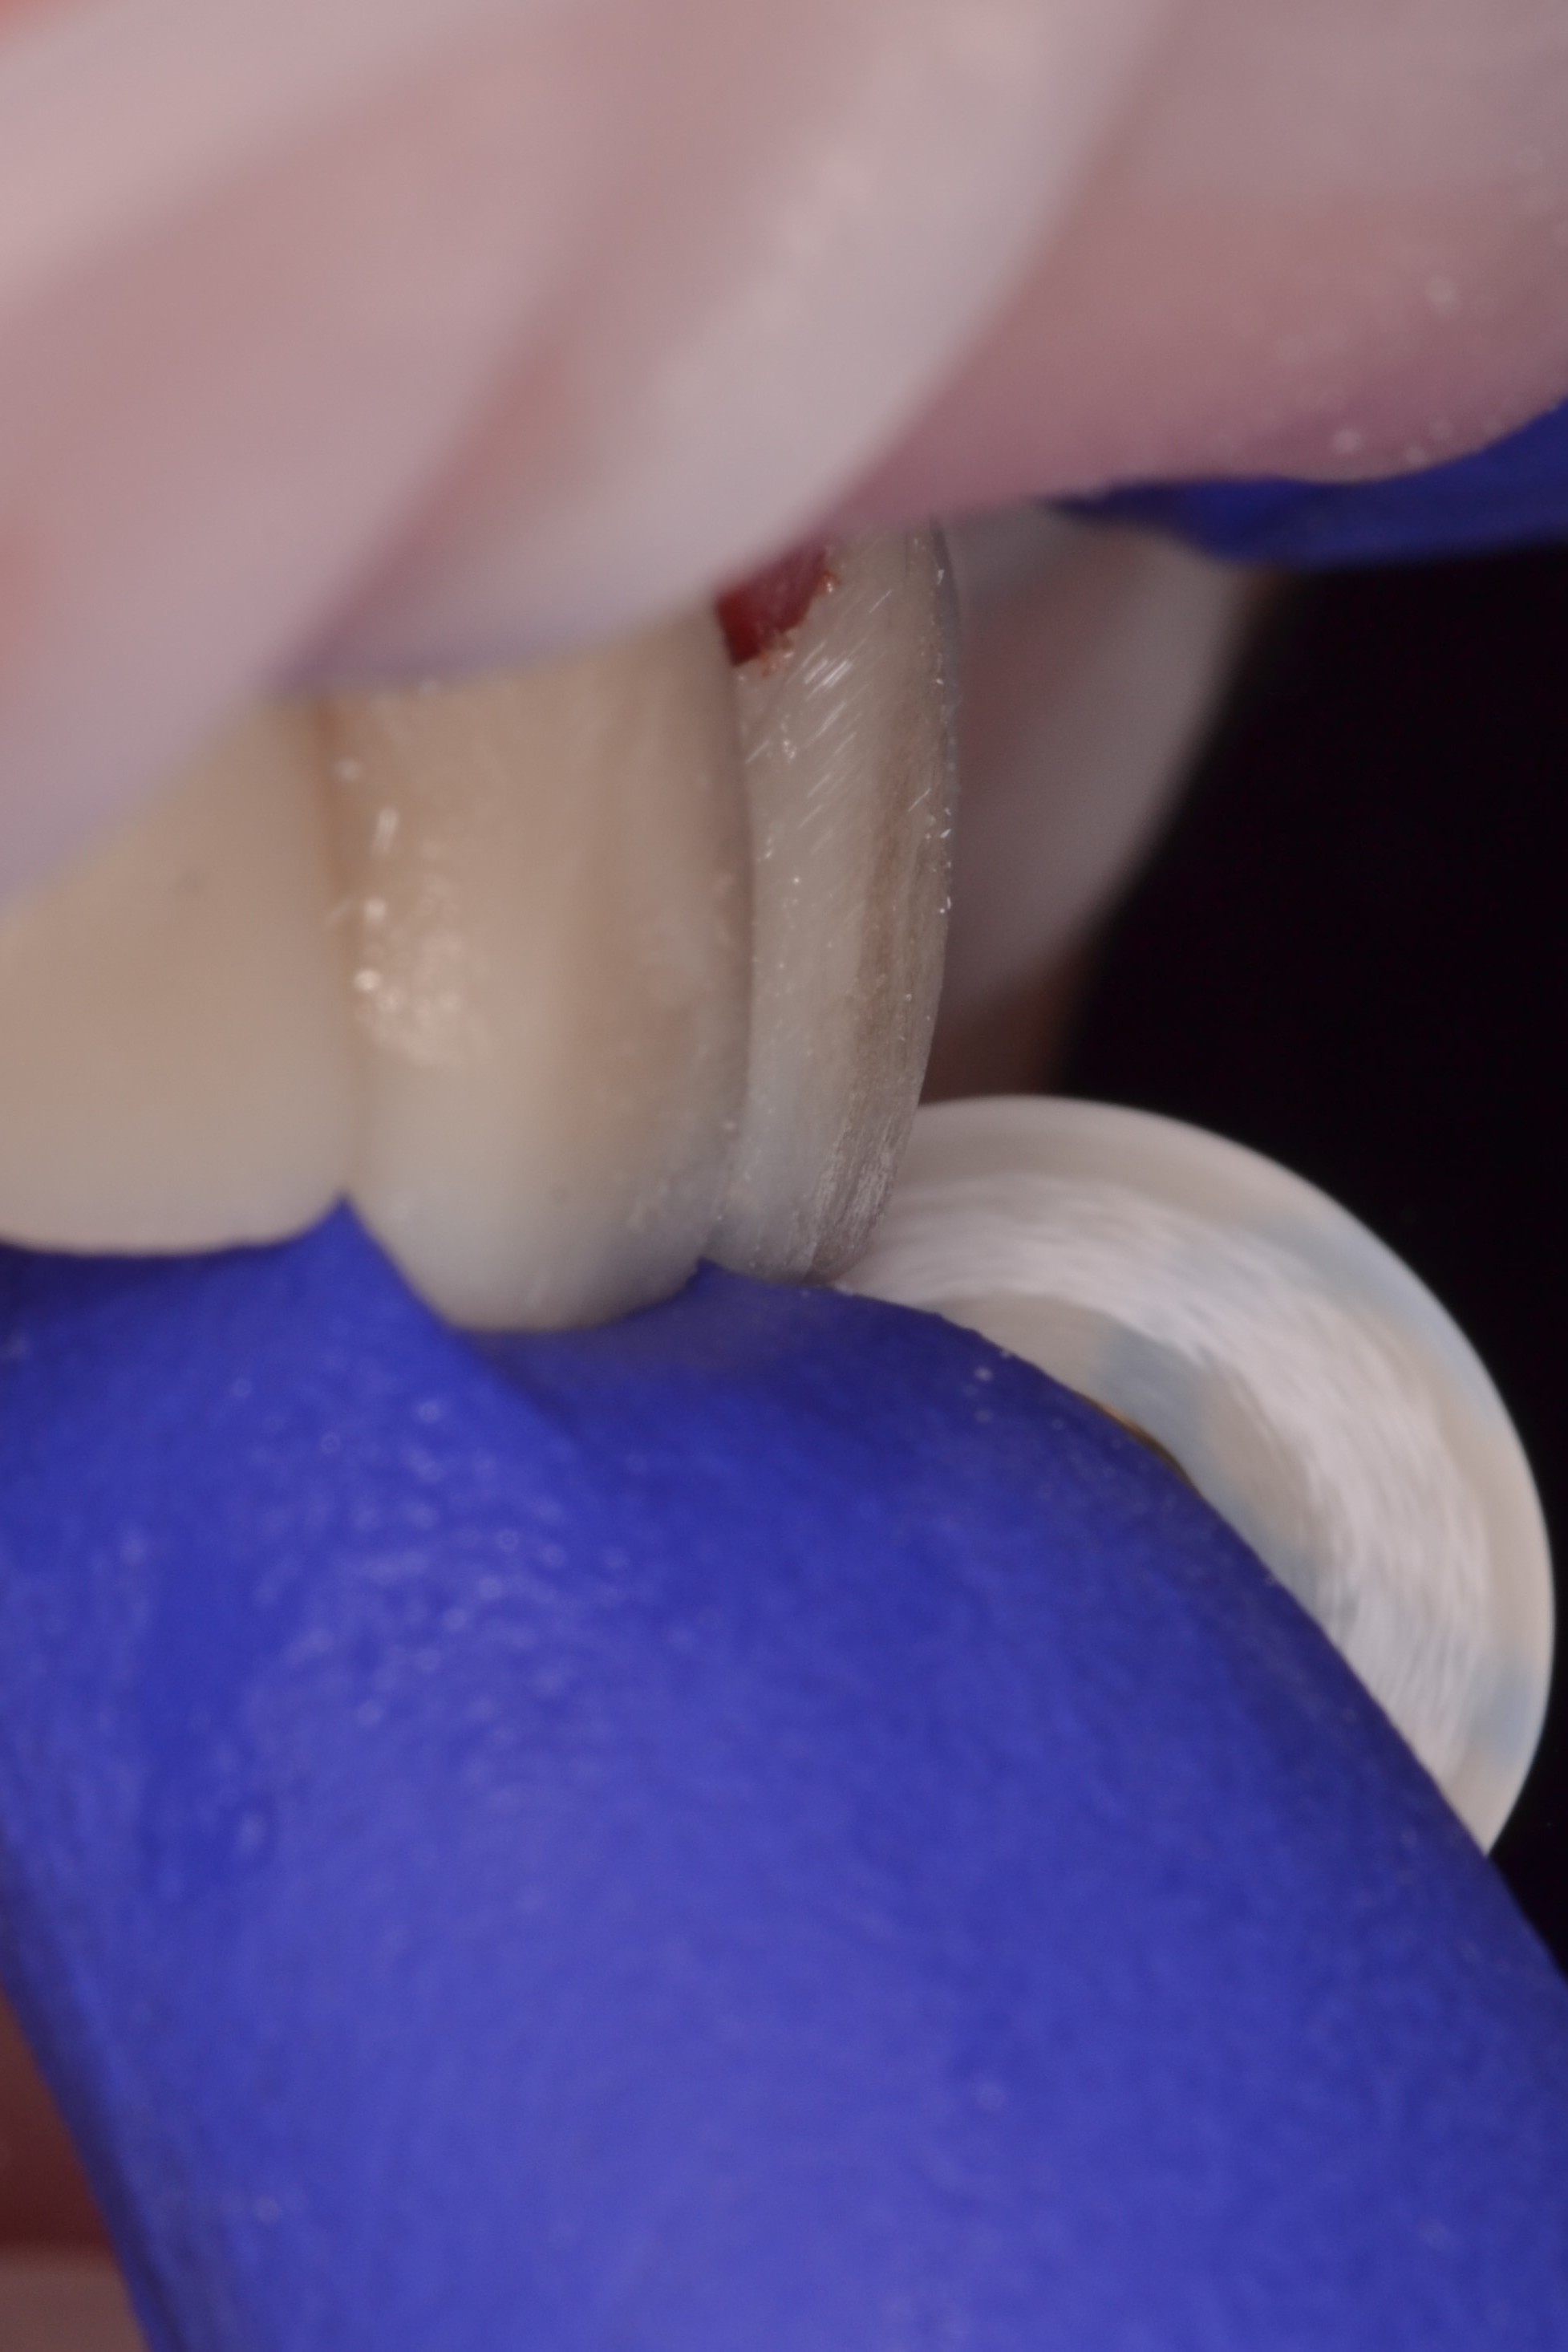
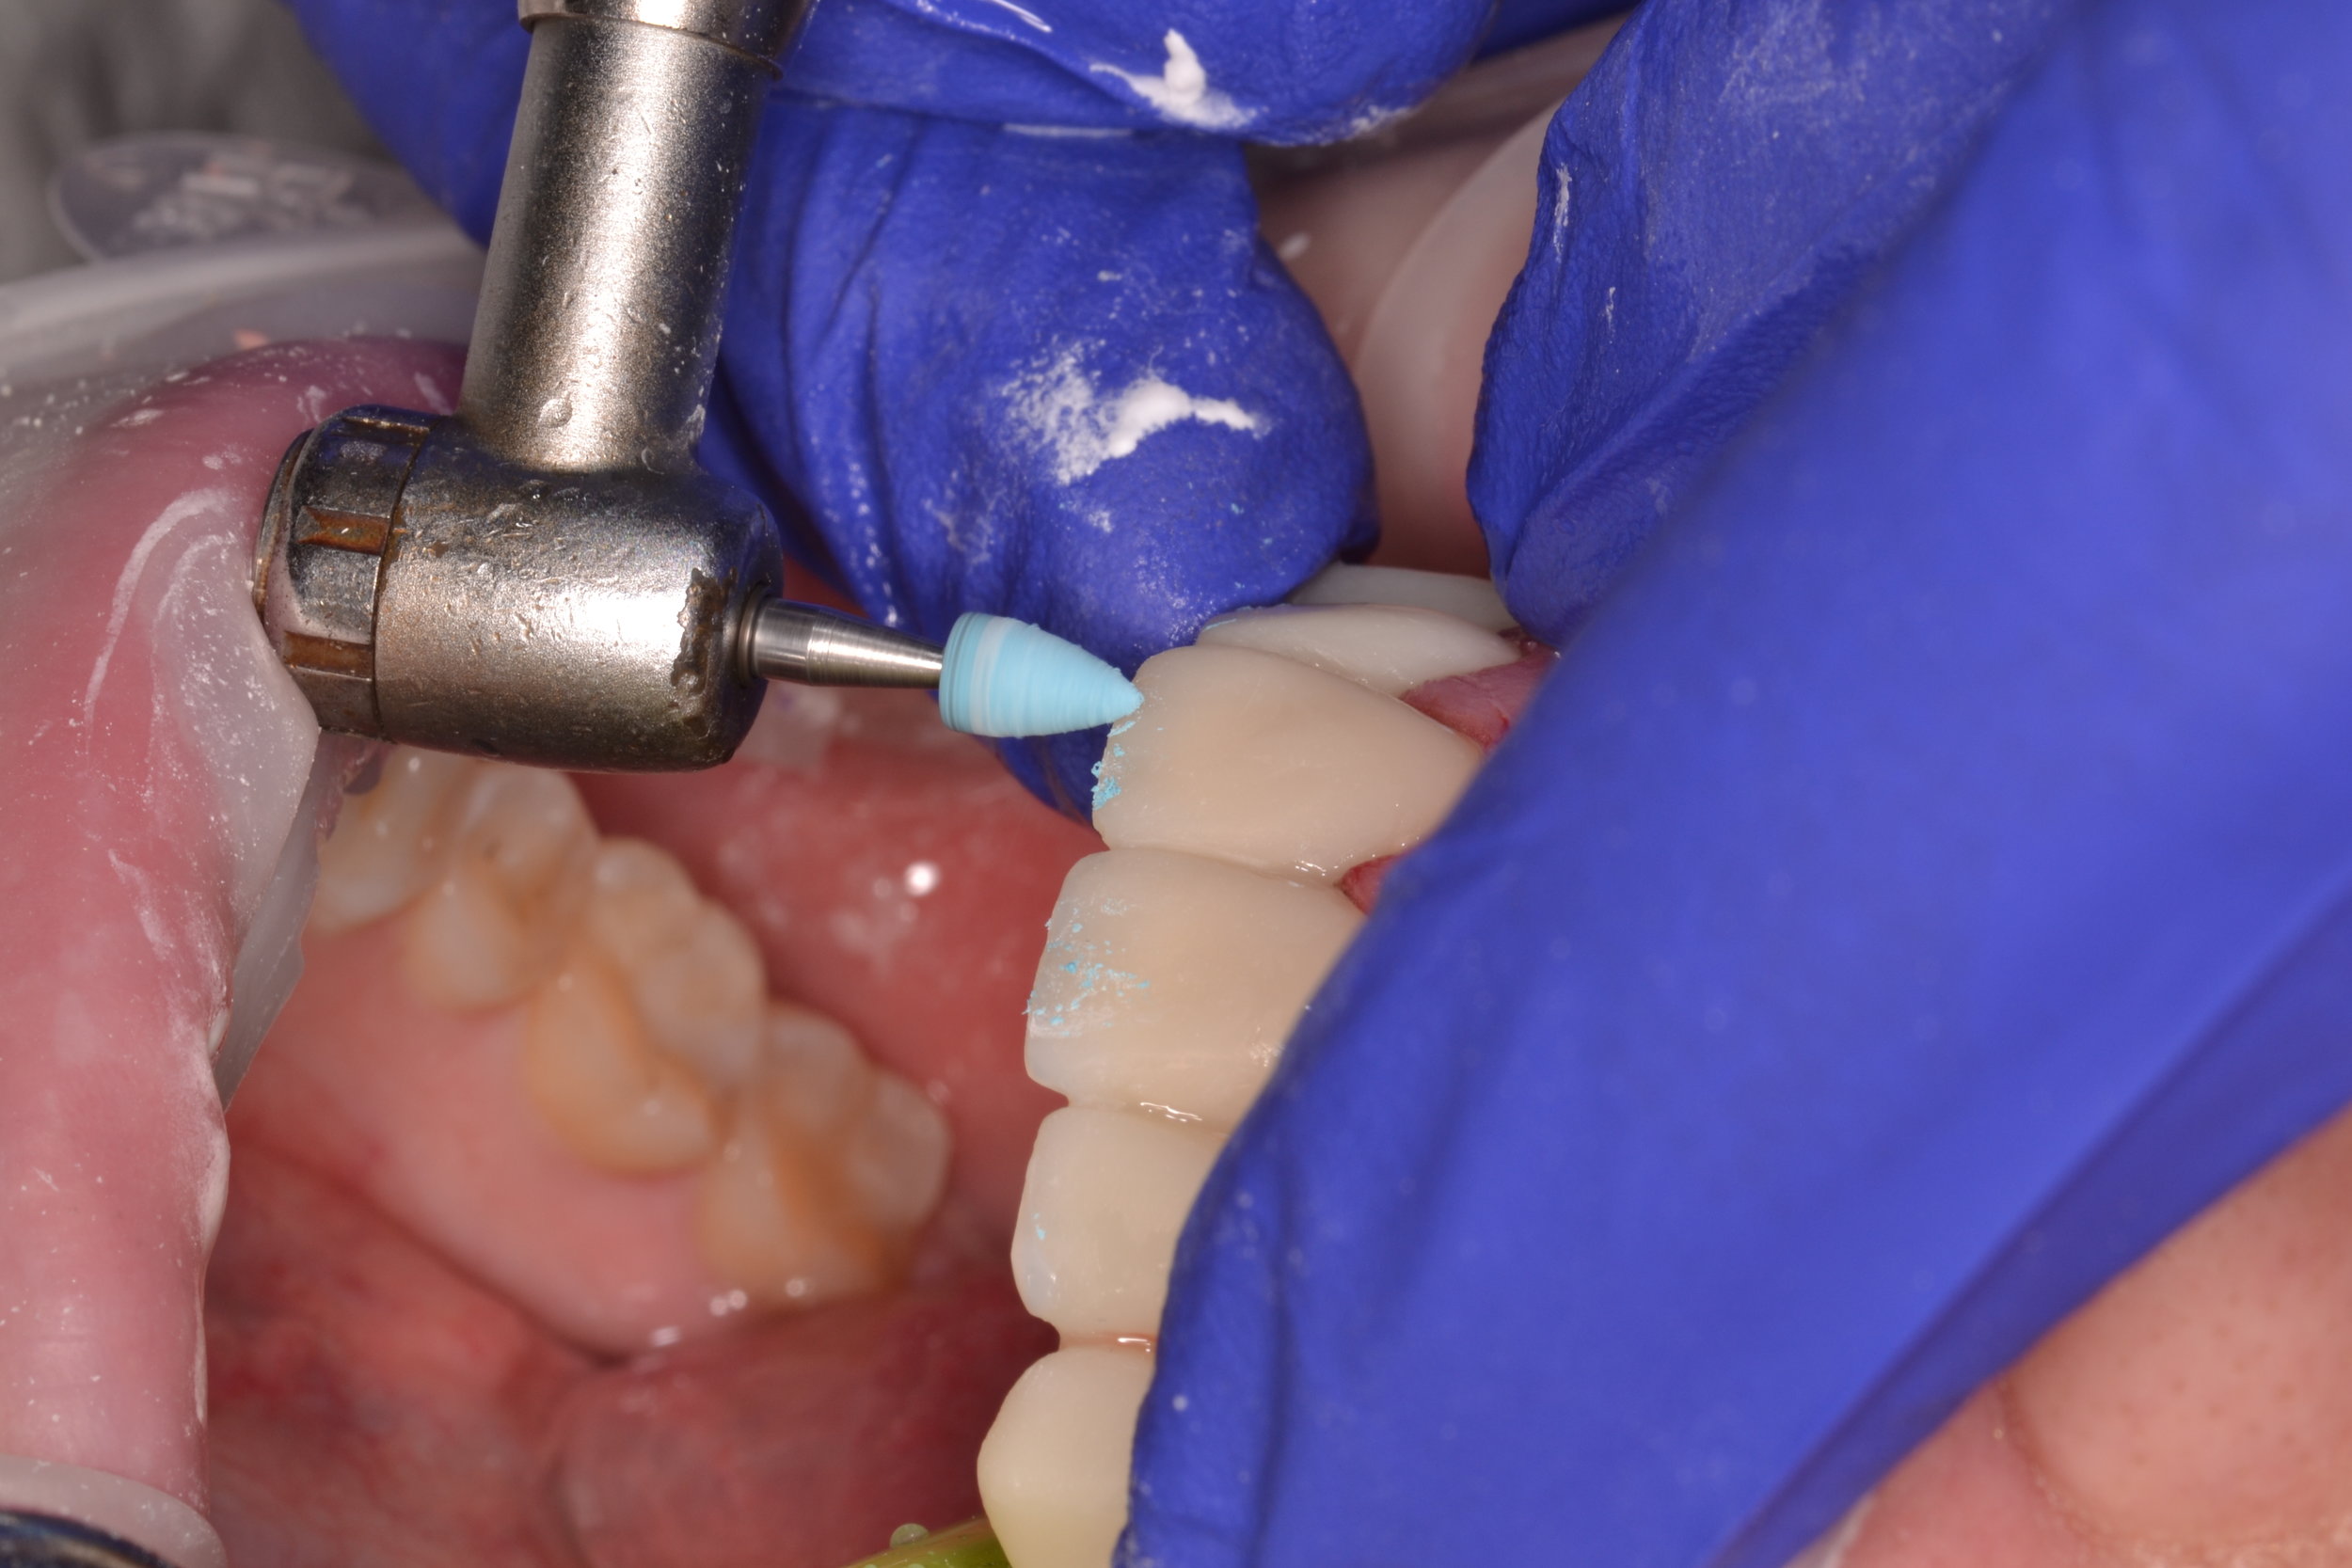

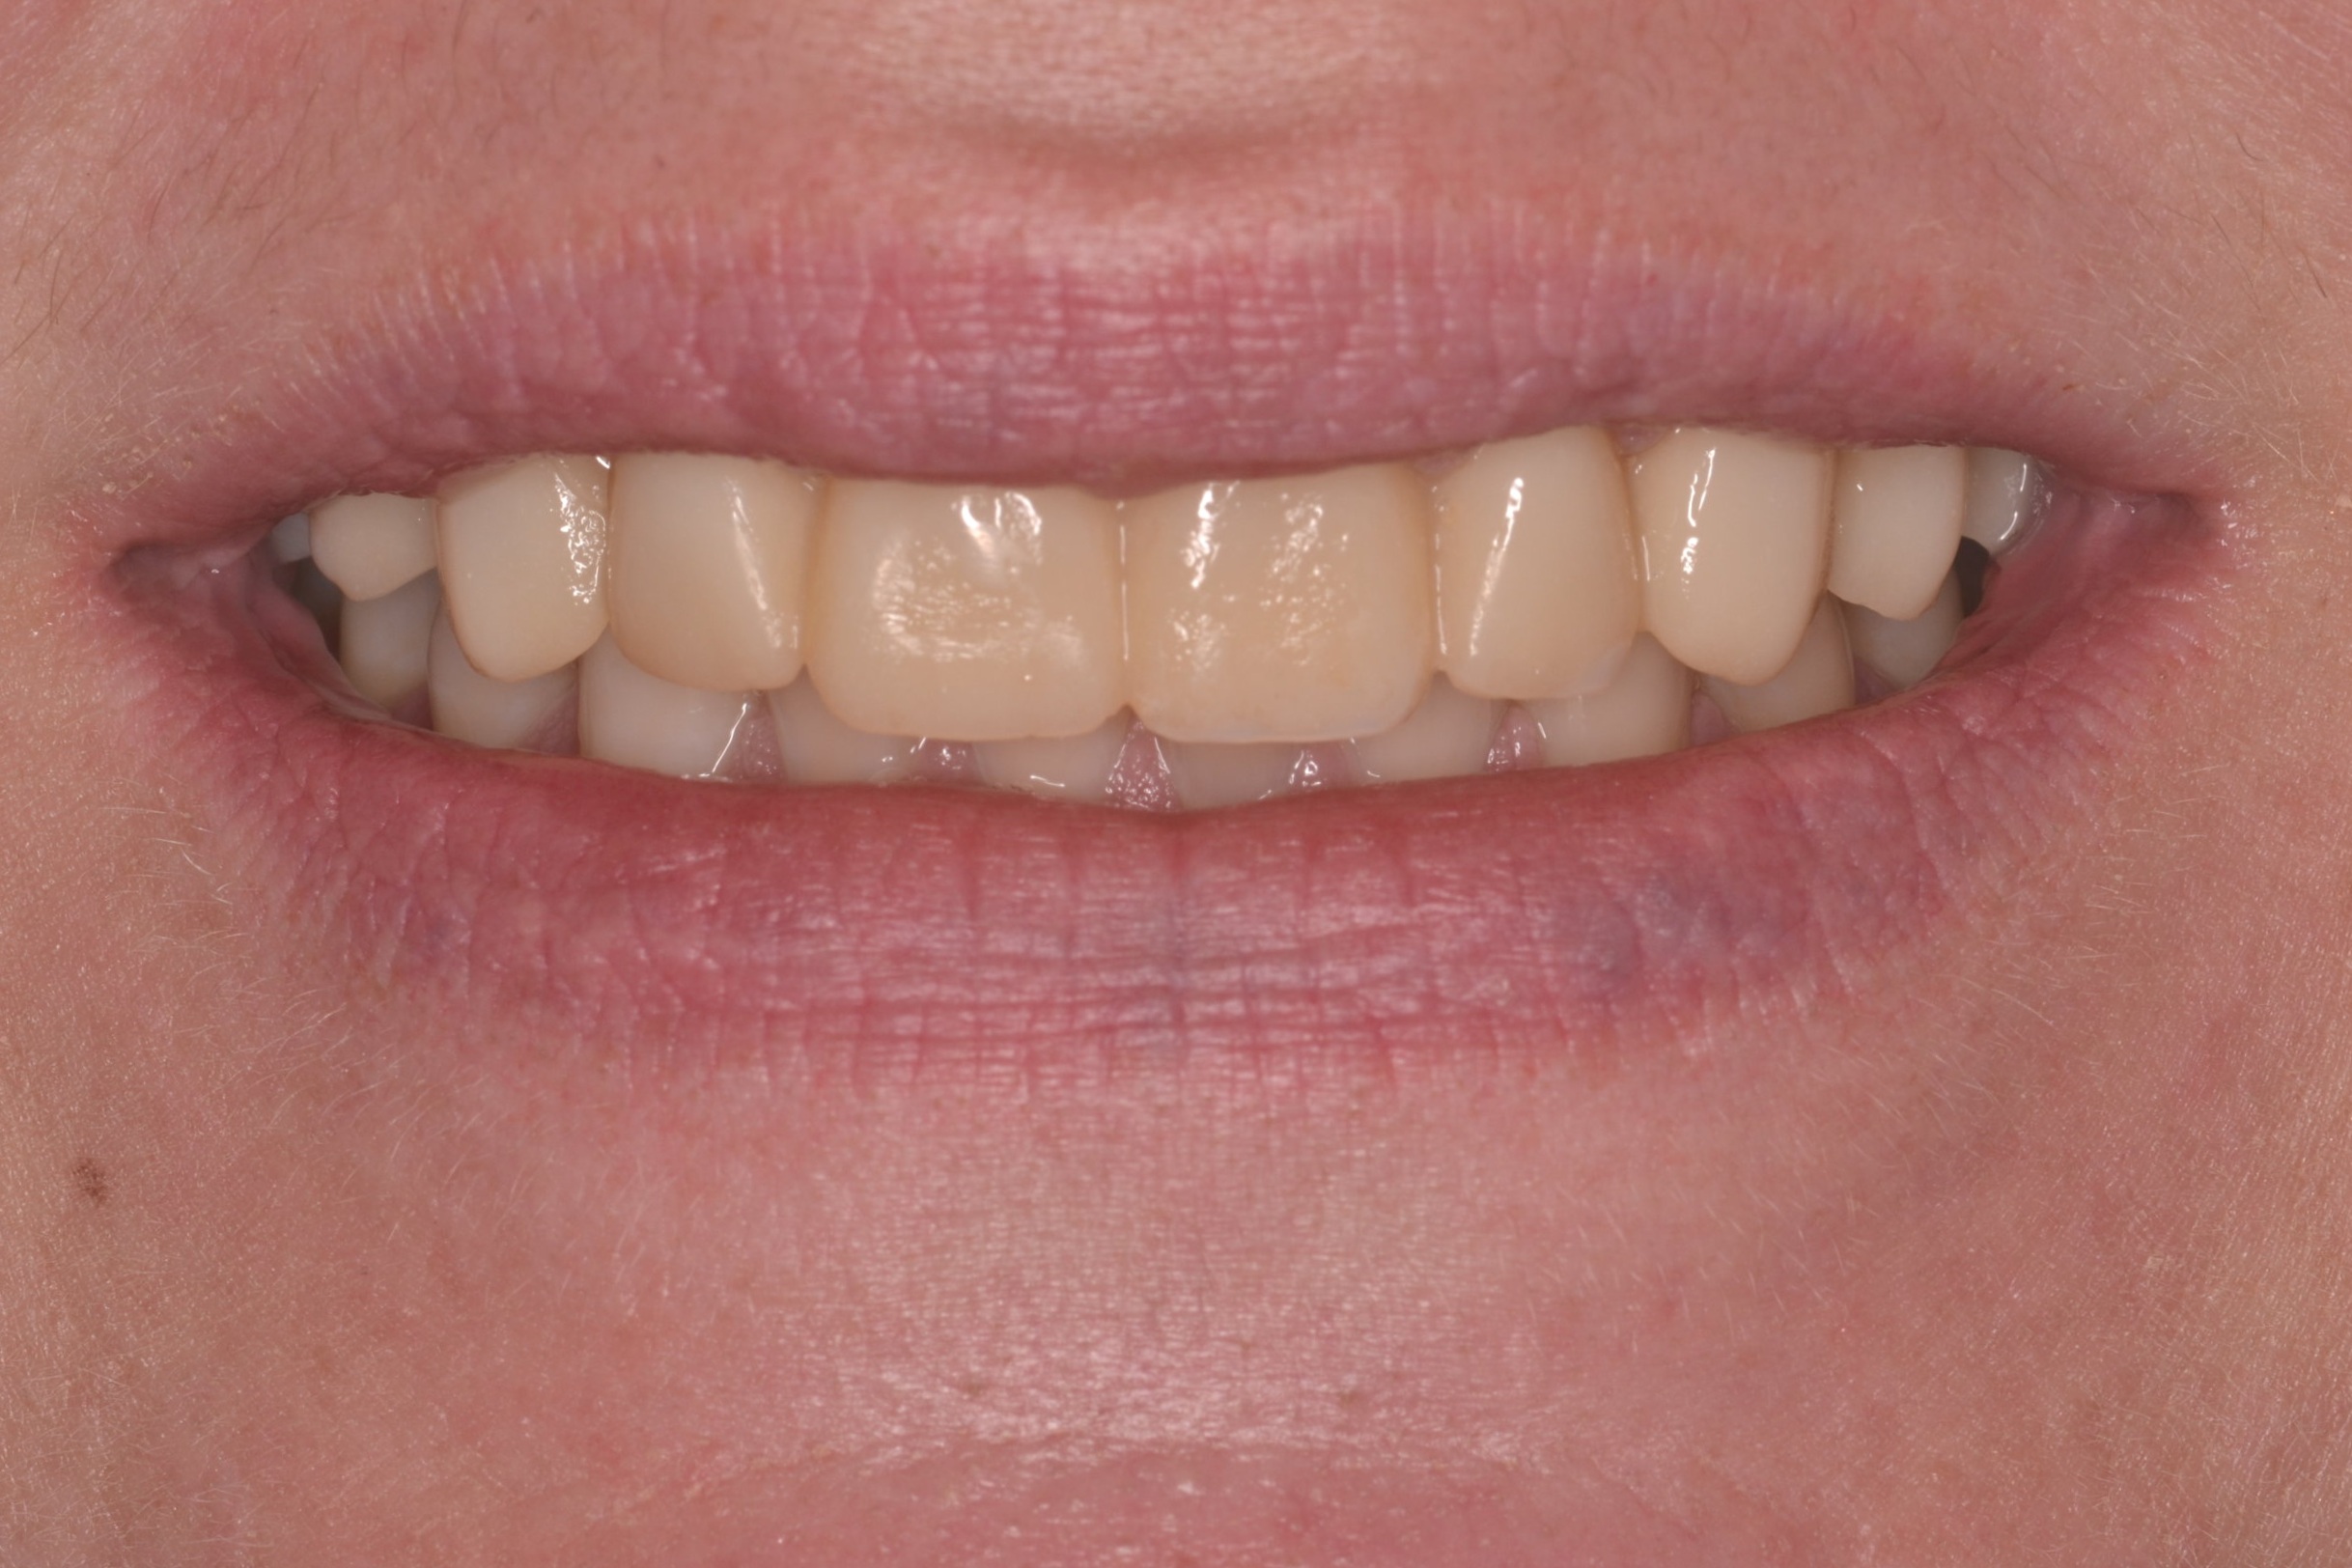
Figure 9m, The finalized provisional restorations on the preparation day.

Figure 10; passing super-floss through healthy gingival embrasures post-operatively.
Patients are given hygiene instructions for the provisional phase of treatment. Since the temporary restorations are connected in the shrink-wrap technique, the patient is asked to use super-floss (or a floss threader) twice a day and is shown how to thread the floss through the opened gingival embrasures (figure 10). The patient is given a Water-Pik and is advised to use it on a relatively low setting (3) for the duration of wearing the temporary restorations. The patient is asked to brush normally, and is given Chlorhexidine Gluconate 0.12% for nightly use. Of course, other modalities such as interproximal brushes or rubber tip simulators can be recommended as the idea is to encourage the patient to maintain exceptional gingival health in an effort to create a favorable environment for an adhesive bonding technique at the time of ceramic restoration insertion.
The patient is re-appointed for evaluation 2 weeks after tooth preparation. Patient feedback about esthetics (including shade), function, and bite comfort are discussed, and necessary adjustments are made. Once the patient and dentist are satisfied, a high-quality impression of the provisional arrangement is made and sent to the lab to communicate incisal edge position and occlusal scheme. Select photographs are also taken for adjunct communication tools (figure 11a-h). In this case, neither the dentist or the patient were happy with the shade of the temporary restorations. New shade tabs of the patient’s desired outcome relative to the current restorations were taken to share with the lab. Finally, the patient is appointed for insertion of the definitive restorations.


It is clear that cases like this are demanding of a clinician’s time, skill, and artistic ability. Thorough planning and execution, as well as the flexibility and ability to change preparation design intra-operatively, are imperative to success. Overall, preparations like this can be extremely rewarding, and very fun to do.

Dr. Ryan J. Yakowicz, DDS, FAGD
Dr. Yakowicz practices in the Greater Madison Area of South Central Wisconsin. Having completed over 775 hours of continuing education, his special interests include functionally cosmetic full mouth rehabilitation, TMD and oral-facial pain, and surgical implant placement and prosthetic restoration.
Dr. Yakowicz is currently the president of the Madison Dental Progress Forum Study Club and the Wisconsin Institute for Advanced Dental Education. He is a Fellow of the Academy of General Dentistry, and a member of the American Academy of Cosmetic Dentistry, and the American Academy of Fixed Prosthodontics. Additionally, Dr. Yakowicz participates in research studies for the National Provider-Based Research Network and is an Ambassador to the National Health Service Corps.
References:
[1] IPS e.max Clinical Guide. https://www.ivoclarvivadent.com/en/p/all/products/all-ceramics/ips-emax-dentist/preparation
[2] Magne P, Besler U. Bonded Porcelain Restorations in the Anterior Dentition: A Biomimetic Approach. Chicago, IL: Quintessence, 2003: 239-246.
[3]Magne P, Douglas WH. Design optimization and evolution of bonded ceramics for the anterior dentition: a finite-element analysis. Quintessence Int. 1999 Oct;30(10):661-72.
[4]Chai, Sy Yin et al. Incisal preparation design for ceramic veneers. The Journal of the American Dental Association. 2018 Jan;149(1): 25-37.