
eMax Preparation Guidelines for Posterior Teeth
When I graduated from dental school in 2010, I had never done a veneer, or any other all ceramic restoration for that matter. It wasn’t until I started practicing and pursuing more continuing education opportunities that I became aware of all of the great materials modern dentistry has to choose from. These days, I routinely use metal-free all ceramic materials like eMax, Empress, and Zirconia in my practice. With a plethora of dental materials to choose from, dental laboratories and dentists must educate themselves on how best to utilize the latest and greatest dental materials. The focus of this article will be on lithium disilicate, more commonly known by its brand name, eMax (Ivoclar Vivadent). (figure 0, a pre-operative view)

FIgure 0; pre-operative view of a mandibular second molar.
I have found eMax to be an extremely versatile material in my practice. It’s strong, fits well, looks great, is lutable with conventional cements or bondable with adhesive resin cements, and remains color stable over time[i]. I commonly use eMax for single unit indirect restorations (inlays, onlays, crowns, and veneers) in the anterior and posterior. Within the main category of all-ceramic crowns, there are two common subsets, monolithic and layered. My preference is usually to place monolithic eMax restorations in the posterior to maximize the flexural strength (commonly over 400 MPa). This restoration can be milled from a CAD/CAM design or pressed from a wax pattern with some differences in mechanical properties.[ii],[iii] As the tooth to be restored moves closer to the anterior, I tend to favor an eMax coping with a layering porcelain to maximize esthetics. It is important to note that the strength of an indirect restoration will always be limited by the weakest component. For example, a monolithic eMax crown will have a flexural strength of about 260-440 MPa, depending on whether it is milled or pressed[iv]. However, a layered (bi-laminar) eMax crown that utilizes lithium disilicate as a coping that is then layered with a feldspathic porcelain (a flexural strength of about 100 MPa) will only have a flexural strength of 100 MPa, as fracture failure of the layering porcelain, and therefore the restoration, will occur at 100 MPa. Now, techniques like micro-cutback for layering ceramics, and maintaining an incisal shroud in core material help keep the restorations strong in areas that experience high flexural stress.
Preparation design for eMax is straightforward, with some potential pitfalls to be aware of. Preparation design should be very smooth, with no sharp internal (if preparing an inlay or onlay) or external line angles. Occlusal reduction can be variable depending on the type of preparation and can get confusing. Thin eMax veneers, for instance, may only require a 0.3 mm of facial reduction. An occlusal veneer in the posterior that is bonded to enamel may only require 1.0 mm of occlusal reduction. For the purpose of practicality and consistency, consider using 2.0 mm as the recommended value of occlusal reduction for eMax in the application of a single unit posterior indirect restoration (figure 1a). It’s an easy number to remember, and any type of indirect restoration in the posterior segment can be utilized with predictability at this depth. Furthermore, a common preparation bur is the 856L-020 round end taper diamond. It is 2 mm wide, allowing visualization of a proper amount of reduction, as the width of the bur can be used to make 2 mm depth cuts in the occlusal table. It sounds obvious, but the operator should be cognizant that the areas of the occlusal reduction follow the anatomy of the tooth. The prepared occlusal table should be deeper in the central fossa, for example (figure 1b). If this is not accomplished, less restorative material will be present in a part of the tooth that commonly receives centric contact from an opposing cusp, increasing the likelihood of material fracture. The buccal or lingual groove is also an important area to consider adequate reduction, as this part of the crown is meant to allow an occlusal spillway for opposing cusps in eccentric movements.

Figure 1a; 2 mm occlusal table reduction, buccal half of a mandibular second molar from a mesial view
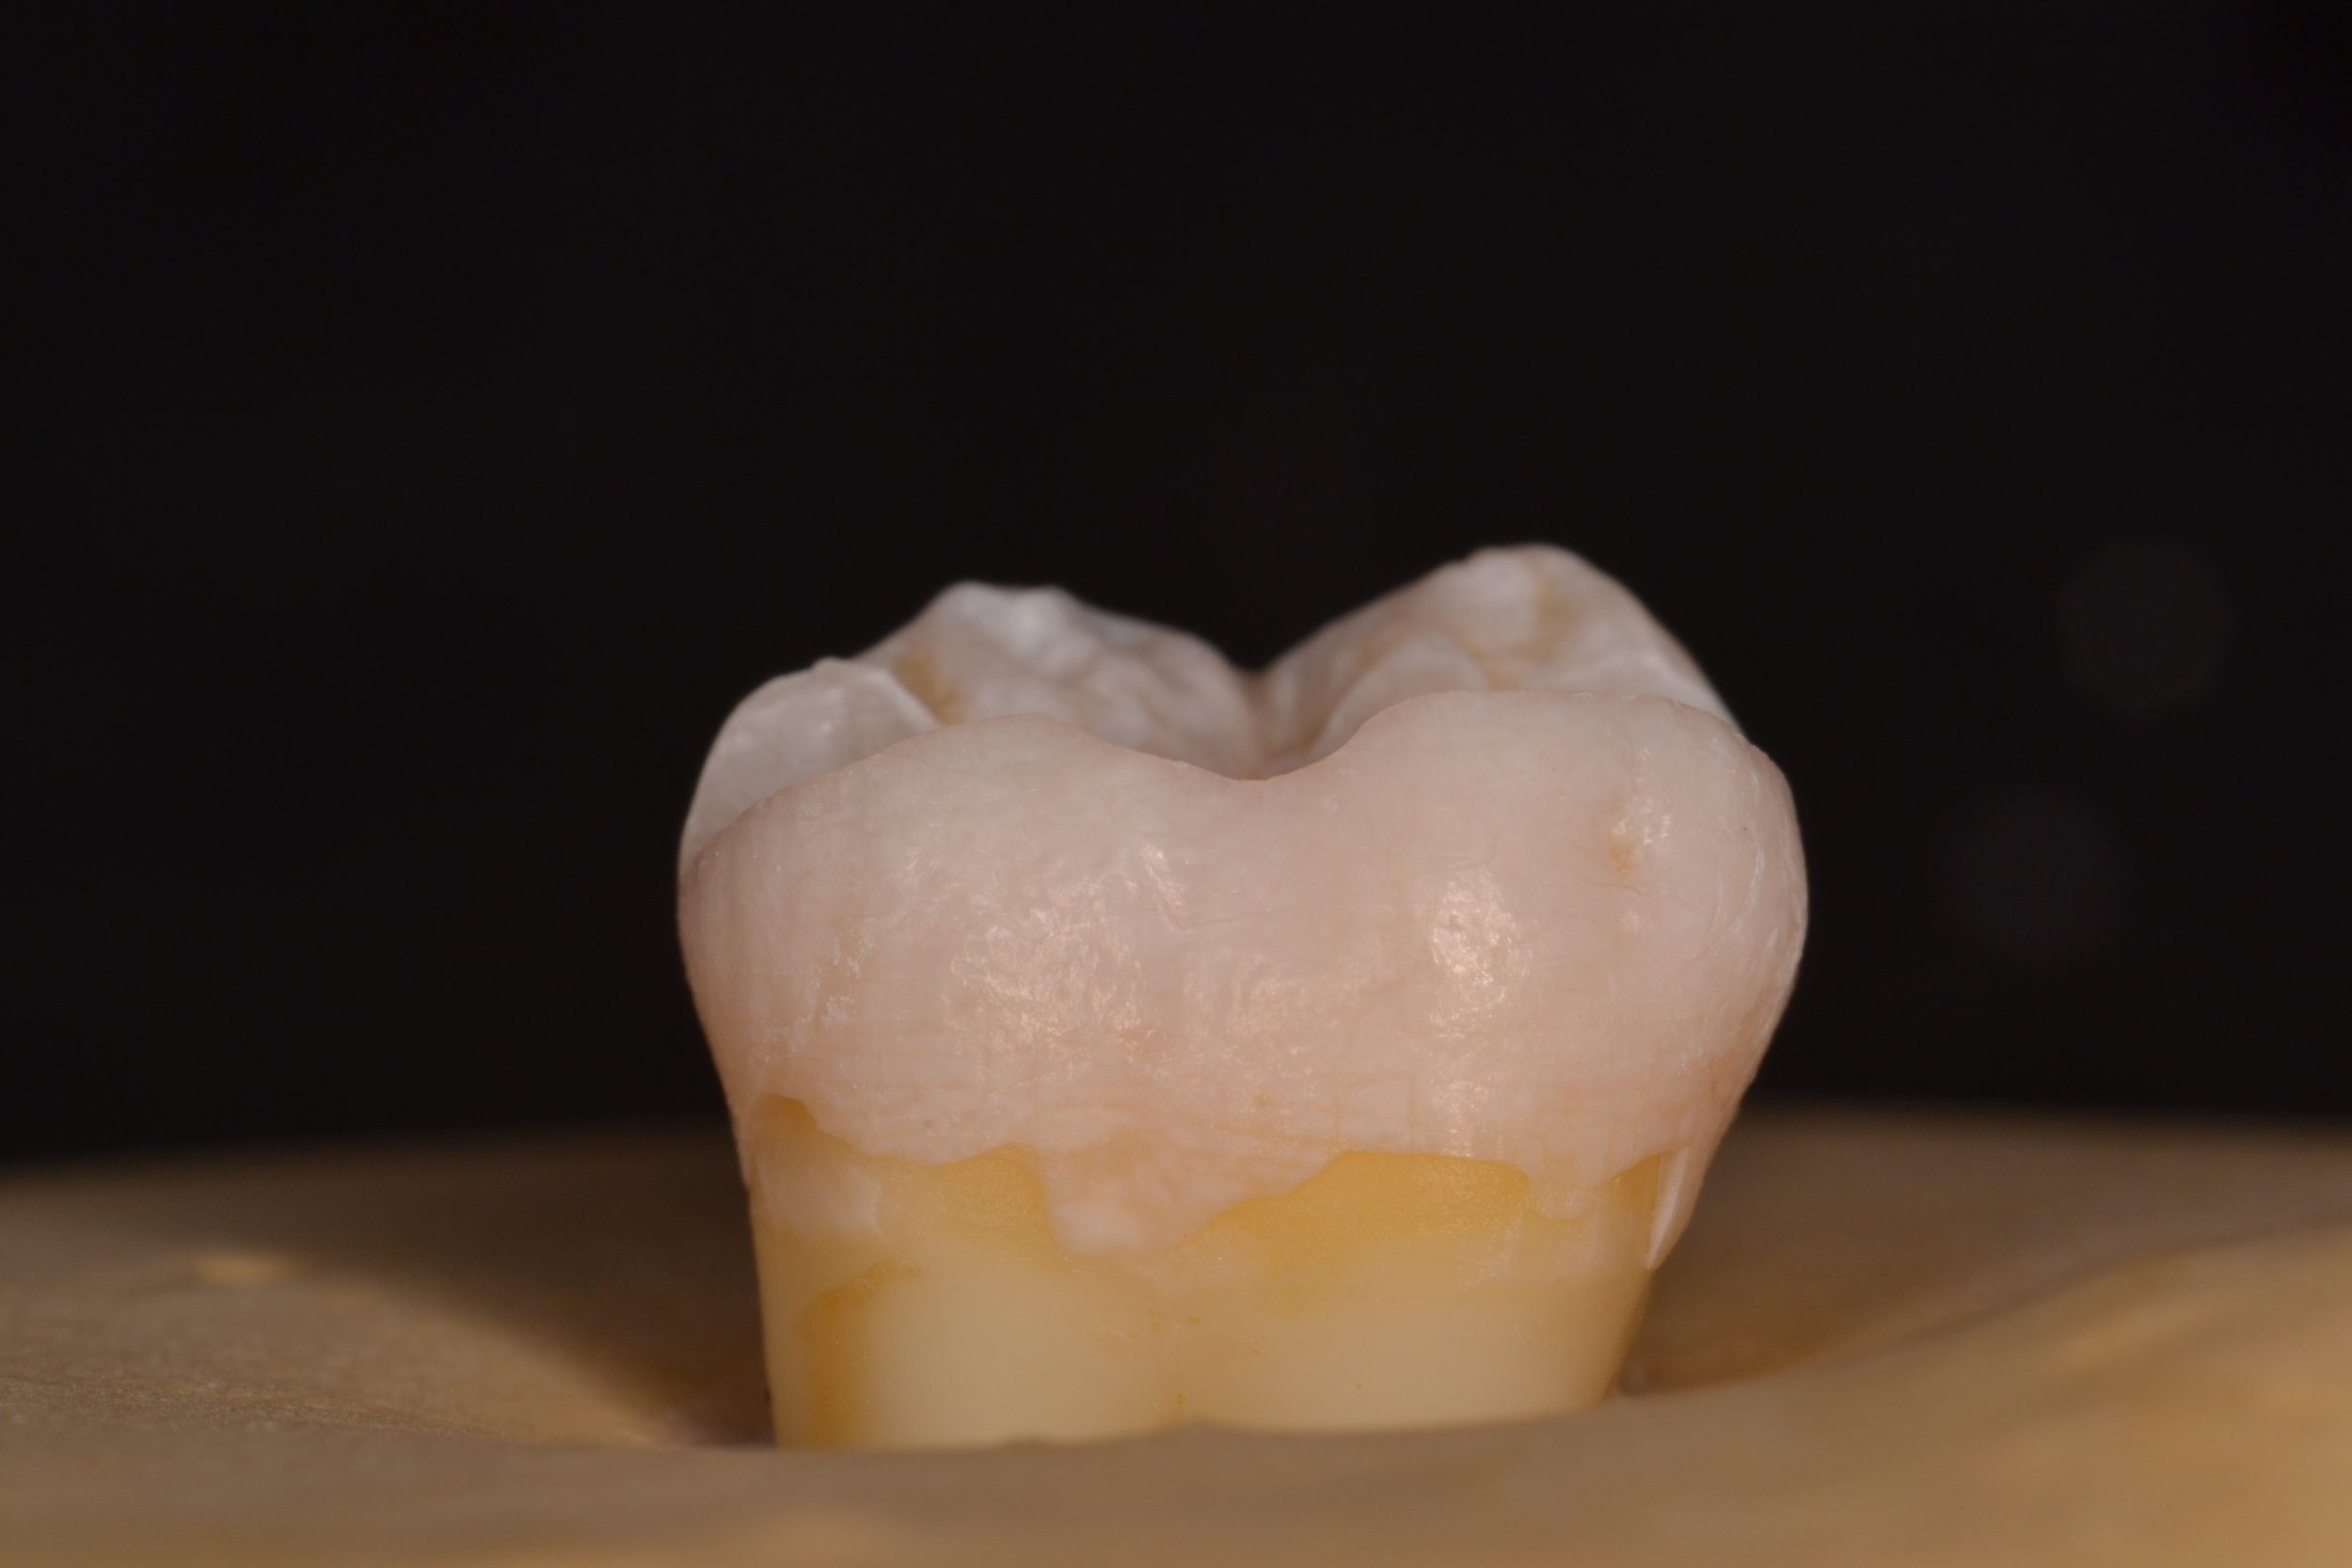
Figure 1b; 2 mm occlusal table reduction, buccal half of a mandibular second molar from a mesial view. The reduction follows the contour of the tooth into the buccal groove
Axial wall reduction is also vital to success. It is imperative that the circumferential axial wall reduction in the coronal third is at least 1.5 mm for an adequate bulk of material. A specific area of the preparation to be acutely aware of is the function cusp bevel, as care needs to be taken to ensure both occlusal and gingival portions “roll” into the bevel. The three planes created by such a bevel should not be well demarcated, and should flow gently into and from one another (figure 2).

Figure 2; The buccal half is prepared to the finish line with a function cusp bevel that is smooth and will not concentrate forces capable of fracturing the all ceramic restoration.
Finish line design should be at minimum a 1 mm wide circumferential heavy chamfer, and is commonly prepared as a shoulder with round internal line angles at the same depth of 1.0 - 1.5 mm (figure 3a, 3b, 3c). When preparing the finish line, special care should be taken to make the finish line smooth while avoid undercuts in the cervical portion of the tooth. Care should also be taken to create a finish line that is in fact round in its internal aspect – a 90-degree shoulder that could be created with a flat end taper diamond should be avoided, as stress will concentrate at the sharp angle that has been incorporated into the preparation design. The margin should probably be more conservative than many operators prepare teeth for all ceramic restorations. The “cowboy hat” margin that approaches 3 mm in width should be avoided in an effort to preserve and conserve natural tooth structure, as a finish line this wide also requires a dramatic increase in the amount of axial wall reduction, ultimately contributing to a greater volume of surgically removed hard tissue. As the margin increases in thickness, it also becomes more difficult to control the smoothness and overall shape of the finish line. Creating unsupported tooth structure by preparing a margin that has a “ski-slope” should be avoided for biologic reasons as well as crown fabrication reasons. The “lip” caused by placing the margin more than halfway beyond the tip of the diamond bur makes crown fabrication difficult, and can present challenges in obtaining an accurate optical scan. Whether the optical scan is done chairside with an intra-oral scanner or at a dental lab to digitize a gypsum model from a conventional impression, the scanner tends to have a hard time picking up the “lip,” compromising accuracy and fit at the margin and potentially creating some hyper-occlusion issues if the restoration does not seat properly. By using the same 856L-020 bur, which is 2 mm wide, half of the bur width will create an adequate 1 mm wide finish line (figure 4). Although eMax offers the operator the ability to adhesively bond the indirect restoration, a tooth preparation with an axial wall height of at least 4 mm and ideal taper of 6 degrees will offer adequate mechanical retention regardless of luting technique.
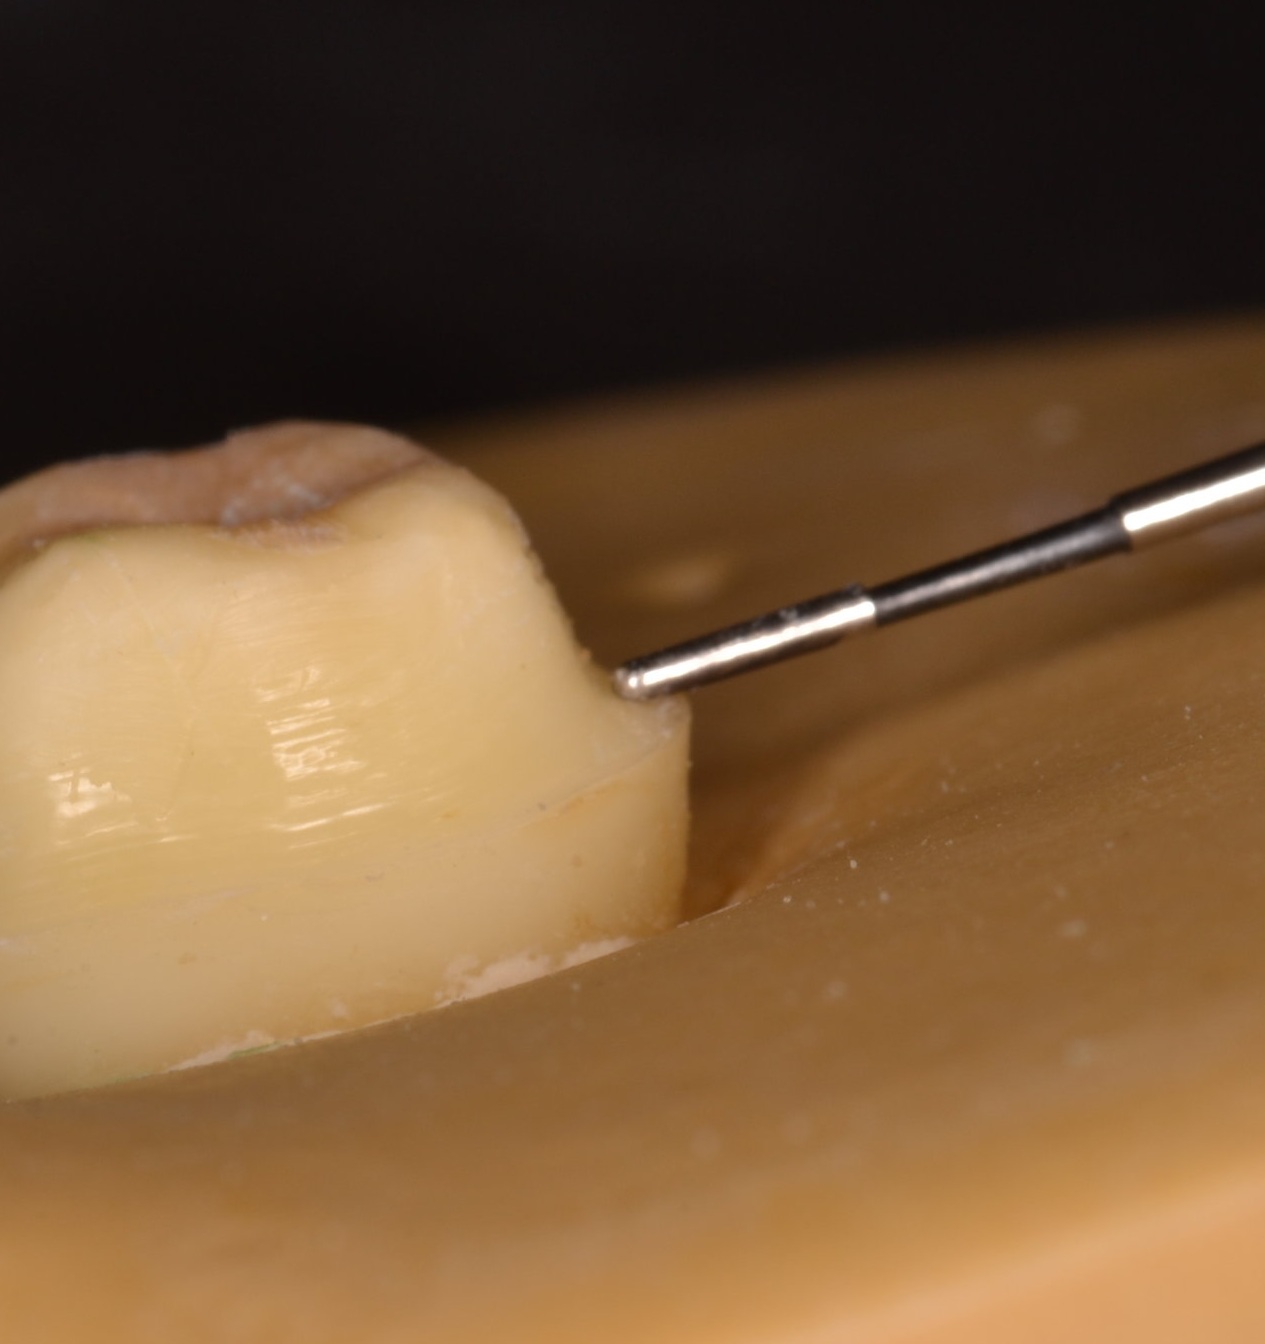
Figure 3a

Figure 3b

Figure 3c, A digitized version of the tooth preparation for eMax crown, with a smooth finish line that is 1 mm in width

Figure 4
Parameters of tooth preparation can change based on location in the mouth, type of indirect restoration, and mode of cementation. This blog is meant to provide guidelines for successful preparation of teeth for single unit posterior eMax crowns (figure 5, figure 6). Online resources are available to further detail specific preparation recommendations from manufacturers like Ivoclar Vivadent (http://www.ivoclarvivadent.com/en/p/all/products/all-ceramics/ips-emax-dentist/preparation).

Figure 5; The completed tooth preparation.

Figure 6; Clinical photo of monolithic eMax crown preparation of a maxillary first molar.
Remember, dentistry should be FUN! Hopefully this knowledge empowers you to predict your clinical outcomes and decreases your stress, so that the next time you prepare an eMax crown, it’s not a job, it’s FUN!
Ryan

Dr. Ryan J. Yakowicz, DDS, FAGD
Dr. Yakowicz practices in the Greater Madison Area of South Central Wisconsin. Having completed over 775 hours of continuing education, his special interests include functionally cosmetic full mouth rehabilitation, TMD and oral-facial pain, and surgical implant placement and prosthetic restoration.
Dr. Yakowicz is currently the president of the Madison Dental Progress Forum Study Club and the Wisconsin Institute for Advanced Dental Education. He is a fellow of the Academy of General Dentistry, and is a member of the American Academy of Cosmetic Dentistry, and the American Academy of Fixed Prosthodontics. Additionally, Dr. Yakowicz participates in research studies for the National Provider-Based Research Network and is an Ambassador to the National Health Service Corps
[i] Color stability of lithium disilicate ceramics after aging and immersion in common beverages
Palla, Eleni-Sotiria et al.
Journal of Prosthetic Dentistry , Volume 119 , Issue 4 , 632 - 642
[ii] Evaluation of marginal discrepancy of pressable ceramic veneer fabricated using CAD/CAM
system: Additive and subtractive manufacturing.
Kang SY, Lee HN, Kim JH, Kim WC
The Journal of Advanced Prosthodontics [22 Oct 2018, 10(5):347-353]
[iii] "Digitally Oriented Materials": Focus on Lithium Disilicate Ceramics.
Zarone F, Ferrari M, Mangano FG, Leone R, Sorrentino R.
Int J Dent. 2016;2016:9840594.